AWS Step-by-Step
Creating and Sharing Route 53 Views
Organizations that use AWS sometimes run into situations in which different groups need to receive completely different DNS responses, based on who they are, their environment, or their operational context. The Route 53 Global Resolver allows you to segment DNS resolution logic into a series of views, effectively partitioning the DNS without having to build completely separate DNS infrastructure.
Recently, Amazon has made it possible to share Route 53 views. That way, a team can maintain control over DNS resolution logic while allowing other teams or external accounts to associate their own private hosted zones, preserving clear ownership boundaries while still participating in a shared DNS resolution framework.
Create a Global Resolver
Before you will be able to create and share DNS views, you will need to create a global resolver, if you do not already have one. To do so, open the Route 53 console, click on the Global Resolvers tab, and then click Create Global Resolver. When you do, you will be taken to the Create Global Resolver screen, shown in Figure 1.
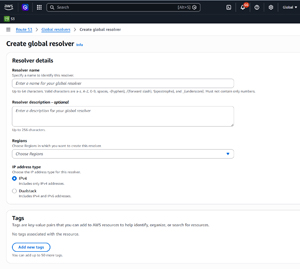 [Click on image for larger view.] Figure 1: This Is the Screen Used to Create a Global Resolver. (source: AWS).
As you can see in the figure, the process of setting up a global resolver is really straightforward. You will need to provide a resolver name, an optional description, specify the regions within which the resolver will be created (a minimum of two regions are required), and then choose the IP address type. When you are done, assign any tags that you might want to use and click the Create Resolver button.
Create a DNS View
Now that you have created a resolver, the next step in the process is to create a DNS view. To do so, click on the resolver that you just created, and then click on the DNS Views tab. From there, click the Create DNS View button. This will take you to the Create DNS View screen, shown in Figure 2.
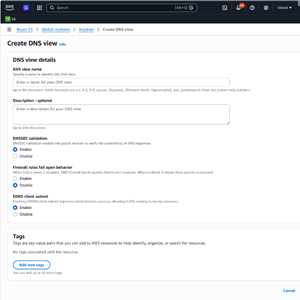 [Click on image for larger view.] Figure 2: You Can Use This Screen to Create a DNS View. (source: AWS).
At a minimum, you will need to provide a name and an optional description for the DNS view that you are creating. There are also three security settings that you can adjust if necessary, but the default values will be fine in many cases. When you are done, click the Create DNS View button.
Normally, after creating the DNS view, you will want to associate private hosted zones with the view. To do so, click on the view that you have just created, select the Private Hosted Zones tab and then click the Associate Private Hosted Zone button, shown in Figure 3.
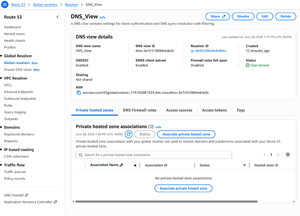 [Click on image for larger view.] Figure 3: Click the Associate Private Hosted Zone Button. (source: AWS).
If you have not yet created any private hosted zones, you can create them at this point of the process. You will simply need to know the domain name and you will have to choose the region and VPC to associate the zone with.
Share the DNS View
The next step in the process is that of sharing the newly created DNS view. To do so, go back to the Global Resolvers screen, click on your resolver, select the DNS Views tab, and then click on the DNS view that you have created. Click the Share button that appears at the top of the screen. You can see what this looks like in Figure 4.
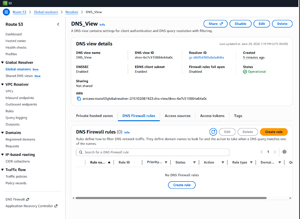 [Click on image for larger view.] Figure 4: Click the Share Button to Share the DNS View. (source: AWS).
Sharing the DNS view is a four step process. The first step in the process is to create a resource share name and to add any necessary resources to the share. To do so, choose Route 53 Global Resolver DNS View as the resource type and then select the resource that you want to share. It is worth noting that at the time when this blog post was written, this option was only available in select regions. You can see what this step looks like in Figure 5.
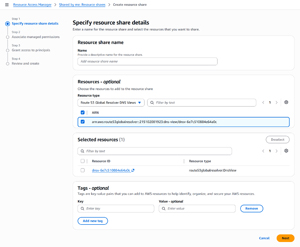 [Click on image for larger view.] Figure 5: Enter a Resource Name and Then Specify Any Resources That You Want to Add to the Share. (source: AWS).
Click Next, and you will be taken to Step 2, where you must choose a managed permission to associate with the view. There are three options available:
- AWSRAMDefaultPermissionDNSView -- View the DNS View and associate their own Private Hosted Zones (recommended).
- AWSRAMPermissionDNSViewLifecycleManagement -- Modify/enable/disable the DNS View, but not associate hosted zones.
- AWSRAMPermissionDNSViewFullAccess -- Both associate hosted zones and manage the DNS View.
Select the appropriate permission, as shown in Figure 6, and click Next.
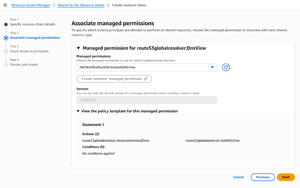 [Click on image for larger view.] Figure 6: Choose the Permission That You Want to Associate. (source: AWS).
The next step in the process is to specify who it is that is allowed to access the shared view. You can choose to allow sharing with anyone, or you can limit sharing to those within your organization. Sharing can be based on a wide variety of principal types including things like AWS account numbers, organizations, and IAM roles, just to name a few.
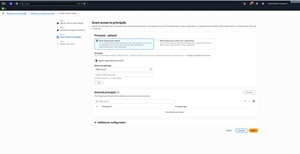 [Click on image for larger view.] Figure 7: Choose Who You Want to Share With. (source: AWS).
Click Next, and you will be taken to the Review and Create screen. Take a moment to make sure that all of the information shown on the screen is correct and then click the Create Resource Share button to share the resource.
About the Author
Brien Posey is a 22-time Microsoft MVP with decades of IT experience. As a freelance writer, Posey has written thousands of articles and contributed to several dozen books on a wide variety of IT topics. Prior to going freelance, Posey was a CIO for a national chain of hospitals and health care facilities. He has also served as a network administrator for some of the country's largest insurance companies and for the Department of Defense at Fort Knox. In addition to his continued work in IT, Posey has spent the last several years actively training as a commercial scientist-astronaut candidate in preparation to fly on a mission to study polar mesospheric clouds from space. You can follow his spaceflight training on his Web site.