AWS Step-by-Step
Using AWS To Create SSL and TLS Certificates
One of the things that has long held true in the world of IT is that SSL (secure sockets layer) and TLS (transport layer security) certificates tend to be expensive. Around the turn of the new millennium, I recall paying nearly $1,000 for an SSL certificate, and the certificate was only valid for a year.
Things have gotten a lot better, but certificates can still be a little bit pricey. I needed an SSL certificate for a project that I was working on earlier this year, and after a bit of shopping around, I found a certificate for a couple hundred dollars.
I will be the first to admit that this isn't a huge amount of money for a large company, but smaller organizations usually need to make each dollar of IT spending count. Thankfully, Amazon Web Services (AWS) makes SSL and TLS certificates available for free.
According to the AWS Certificate Manager Pricing page, "SSL/TLS certificates provisioned through AWS Certificate Manager are free. You pay only for the AWS resources you create to run your application."
To create a certificate, log in to the AWS console, and then choose the Certificate Manager option from the list of AWS services. The Certificate Manager option is located in the Security, Identity, and Compliance section. Upon choosing this option, you will be taken to the AWS Certificate Manager screen, which you can see in Figure 1. Click on the Get Started button to begin the process of requesting a certificate.
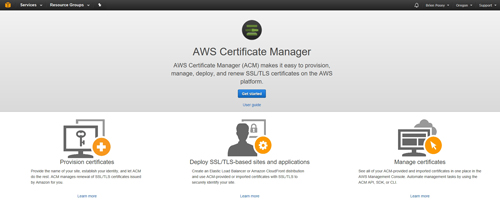 [Click on image for larger view.] Figure 1: Click on the Get Started button to begin the process of requesting a certificate.
If you have ever requested a certificate from a commercial certificate authority, then you know that there is usually some sort of process that you have to go through in order to prove that you actually own the domain for which you are requesting a certificate. AWS does things in a similar manner, so you will only be able to request certificates for domains that you actually own or manage.
Upon clicking the Get Started button shown in the previous figure, the AWS console will open the Request a Certificate wizard, which you can see in Figure 2. As you can see in this figure, the wizard's initial screen prompts you to enter the domain name that is to be associated with the certificate.
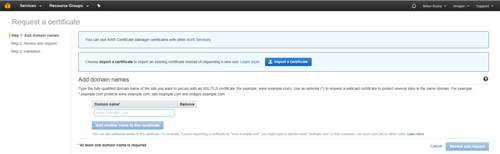 [Click on image for larger view.] Figure 2: Enter the fully qualified domain name for the resource that you want to protect.
It is important to note that unless you are creating a wildcard certificate, you will need to enter the fully qualified domain name for the resource that you want to secure with the certificate. For example, I own a domain named brienposey.com. If I needed an SSL certificate to secure a mail server within my domain, I might enter mail.brienposey.com as the fully qualified domain name.
As you look at Figure 2 above, you will notice that it includes an option to add another name to the certificate. If your goal is to create a Subject Alternate Name (or SAN) certificate, then you can use this button to assign all of the required names to the certificate.
Another option is to create a wildcard certificate. Wildcard certificates allow you to protect all of the resources within a domain using a single certificate. To create a wildcard certificate, simply enter an asterisk followed by your domain name. It is generally advisable to avoid using wildcard certificates unless you have a compelling reason to do so. Although wildcard certificates are convenient, there are security risks associated with their use.
Once you have entered the domain name that you want to associate with the certificate request, click the Review and Request button. This will take you to the screen shown in Figure 3. You should use this opportunity to review the domain name to make sure that you have not made any typing errors.
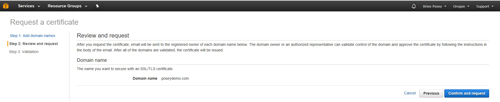 [Click on image for larger view.] Figure 3: Take a moment to check the spelling of the domain name.
Now, click Confirm and Request. Upon doing so, AWS will perform a query to determine the contact person for the specified domain, and will send instructions to that person for validating domain ownership. These instructions are sent by e-mail and look similar to what is shown in Figure 4.
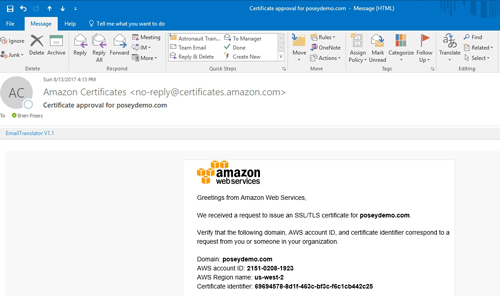 [Click on image for larger view.] Figure 4: AWS validates domain ownership through e-mail.
Although not shown in the figure above, the message contains a link that you can use to validate domain ownership. Simply click on this link to complete the validation process.
About the Author
Brien Posey is a 22-time Microsoft MVP with decades of IT experience. As a freelance writer, Posey has written thousands of articles and contributed to several dozen books on a wide variety of IT topics. Prior to going freelance, Posey was a CIO for a national chain of hospitals and health care facilities. He has also served as a network administrator for some of the country's largest insurance companies and for the Department of Defense at Fort Knox. In addition to his continued work in IT, Posey has spent the last several years actively training as a commercial scientist-astronaut candidate in preparation to fly on a mission to study polar mesospheric clouds from space. You can follow his spaceflight training on his Web site.