AWS Step-by-Step
Migrate a Microsoft Azure VM to AWS, Part 2
Now that you've downloaded and resized the Azure virtual hard disk, here comes the slightly more complicated part: actually prepping the virtual hard disk for the Amazon Web Services cloud.
In the previous installment of this series, I showed you how to download a virtual hard disk from Microsoft Azure and how to reduce the virtual hard disk's physical size to allow for an easier upload.
In this article, I want to show you how to prepare the virtual hard disk for use on the Amazon Web Services (AWS) cloud and how to turn the virtual hard disk into an AWS instance.
AWS has a laundry list of things that you will have to do in order to successfully import a virtual machine (VM). I will walk you through some of the more important tasks and then, at the end of the article, I will give you a link to the full list of requirements.
As it stands right now, you presumably have a virtual hard disk that has been downloaded from Azure. I am also assuming that you have the necessary licenses to use the software contained within the virtual hard disk.
In order to prepare the virtual hard disk, we need to temporarily attach it to a VM. For the sake of demonstration, I will be using Hyper-V. Open the Hyper-V Manager, and choose the New | Virtual Machine option from the Actions pane. This will launch the New Virtual Machine Wizard. Click Next to bypass the wizard's Welcome screen. On the next screen, provide a name for the temporary VM and click Next.
You will now be prompted to specify a VM generation. You must use the Generation 1 option, as shown in Figure 1 below.
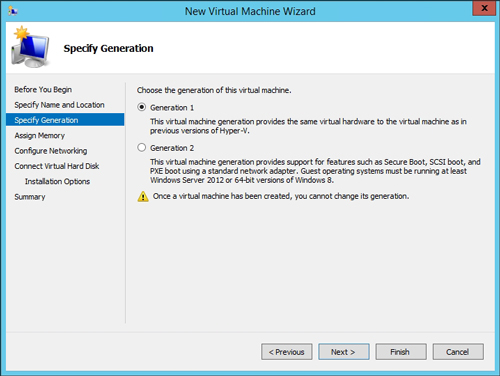 [Click on image for larger view.] Figure 1: You must create a generation 1 virtual machine.
Click Next, and then assign an appropriate amount of memory to the VM. Click Next again and choose how the VM will connect to your network. Although this VM is temporary in nature, it is a good idea to provide for network connectivity.
Click Next, and you will arrive at the screen that is normally used to create a virtual hard disk. Since you already have a virtual hard disk, choose the option to use an existing virtual hard disk, and then specify the path and filename for the virtual hard disk that you downloaded. You can see what this looks like in Figure 2. Click Finish to create the VM.
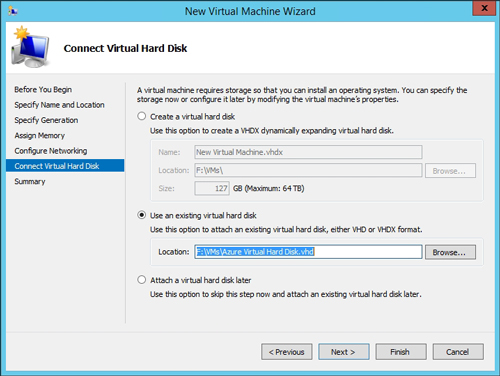 [Click on image for larger view.] Figure 2: Attach your virtual hard disk to the virtual machine.
Now, open the VM console within the Hyper-V Manager and boot the VM.
Once the VM boots, the first thing that I recommend doing is running Windows Update to make sure that the VM has the latest updates from Microsoft. Remember: The update process can be resource-intensive and AWS charges you for the resources that you use, so why not save a few bucks by performing the update locally?
Next, check the amount of free space on the virtual hard disk. AWS needs at least 250MB of free space. The easiest way to check a VM's free space is by using the DIR command, shown in Figure 3.
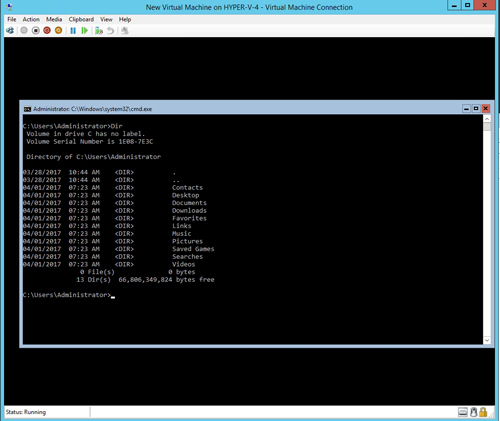 [Click on image for larger view.] Figure 3: Make sure that the virtual machine has plenty of free space.
Next, you will need to make sure that the VM only has one network interface. The easiest way to do this is by typing the following command:
Netsh Interface Show Interface
You can see what this looks like in Figure 4. If multiple network adapters do exist, you can use the Hyper-V Manager to delete the extra network adapters.
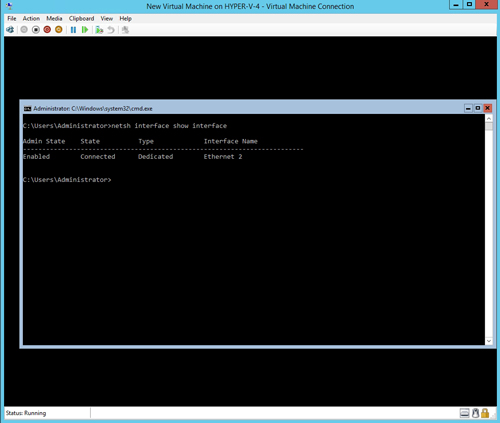 [Click on image for larger view.] Figure 4: Make sure that only a single network adapter exists.
More than likely, the VM is now ready to Sysprep and then import into AWS. However, it is a good idea to check AWS' list of limitations, just to make sure that no other issues need to be addressed. You can find this list here.
Sysprep randomizes the VM and gets it ready for use in the cloud. As mentioned in the previous column, Sysprep can be destructive, so be very careful about using it on application servers. You can find Microsoft's documentation for Sysprep here.
When you run Sysprep, you will need to use the Generalize and the OOBE switches. OOBE stands for Out of Box Experience. It essentially tells Windows to run a mini Setup program the next time that the VM is booted. You can see how Sysprep works in Figure 5.
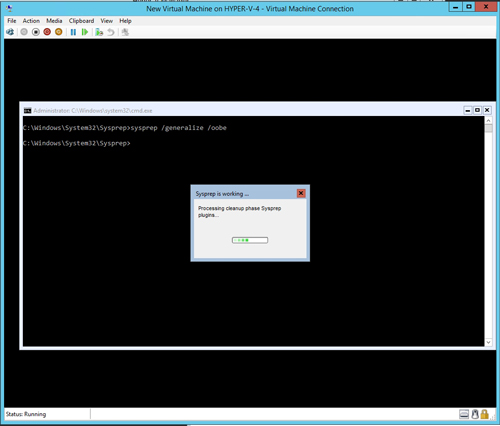 [Click on image for larger view.] Figure 5: Sysprep can be destructive, so it is a good idea to make a backup of the virtual hard disk before running Sysprep.
Once Sysprep has been run, you must shut down the VM (it should shut down automatically). If you boot the VM again, you will have to rerun Sysprep, and there is a limit to the number of times that a VM can be Sysprepped.
It is now necessary to disassociate the virtual hard disk from the Hyper-V VM. To do so, right-click on the VM and choose the Delete command from the shortcut menu. When the Hyper-V Manager deletes a VM, it removes the VM object but leaves behind the virtual hard disk. If you look at Figure 6 below, you can see that even though I have deleted the VM, the virtual hard disk still exists.
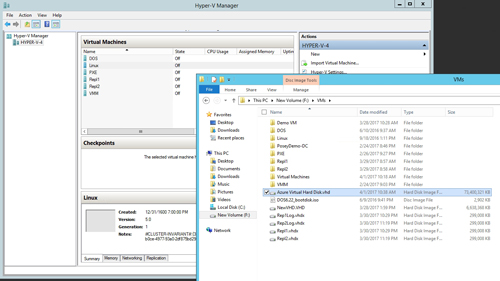 [Click on image for larger view.] Figure 6: The virtual machine has been deleted, but the virtual hard disk remains.
Now it is time to import the VM into AWS. This process essentially involves creating a bucket (if necessary), creating a service role, and then importing the VM. AWS provides documentation for these steps here.
About the Author
Brien Posey is a 22-time Microsoft MVP with decades of IT experience. As a freelance writer, Posey has written thousands of articles and contributed to several dozen books on a wide variety of IT topics. Prior to going freelance, Posey was a CIO for a national chain of hospitals and health care facilities. He has also served as a network administrator for some of the country's largest insurance companies and for the Department of Defense at Fort Knox. In addition to his continued work in IT, Posey has spent the last several years actively training as a commercial scientist-astronaut candidate in preparation to fly on a mission to study polar mesospheric clouds from space. You can follow his spaceflight training on his Web site.