AWS Step-by-Step
Getting Started with AWS Verified Access, Part 1
This series introduces AWS Verified Access, an alternative to VPNs for secure external application access.

VPNs have long been known for their ability to provide secure access to applications over untrusted networks, such as the Internet. When it comes to secure application access however, VPNs are not the only option. Amazon offers a feature called Verified Access that allows you to provide secure external access to applications without the need for a VPN.
The process is based around a Verified Access instance, which is in turn connected to one or more trust providers. The Verified Access instance acts as the portal through which to connect to applications and the trust providers handle the authentication process. An express access policy then directs authenticated users to the application that they want to use. This article series is designed to act as a starting point for setting up Verified Access. It will be up to you however, to create your own policies.
To get started, log into the AWS console and launch the Verified Access service. Next, click on the Create Verified Access Instance button. At this point, you will be taken to the Create Verified Access Instance screen, shown in Figure 1. As you can see in the figure, this screen only contains a few simple fields.
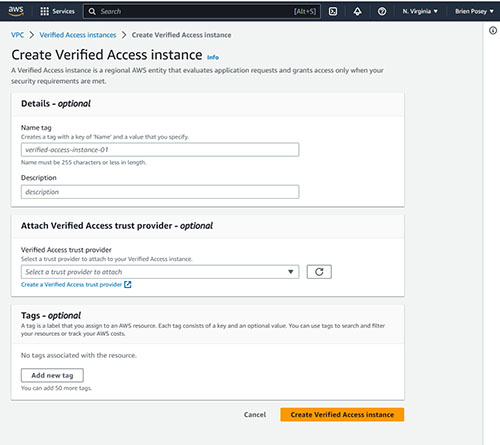 [Click on image for larger view.] Figure 1. This is the screen used to create a verified access instance.
Before I walk you through the process of creating a Verified Access instance, I want to quickly reiterate that a Verified Access instance is a mechanism that evaluates application requests and determines whether or not to grant access based on whether or not the underlying security requirements have been met. The reason why I bring this up is because the first step in creating a verified access instance is to enter a name and an optional description for the instance that you are creating. Once you get a feel for how Verified Access works, you will likely end up creating additional Verified Access instances. As such, it is a good idea to use a descriptive name (and an even more detailed description) conveying what the instance is to be used for.
The next step in the process is to attach a Verified Access trust provider. Oddly enough, Amazon has made this step optional. Even so, an instance does not do anything unless it is attached to a trust provider. The trust provider is the mechanism that actually performs the identity verification or device security verification process. Incidentally, you aren't limited to using just one verified access trust provider. You can link multiple trust providers to a single Verified Access instance. For right now, don't worry about setting up a verified access trust provider. I will show you how to create and attach a verified access trust provider in a moment.
The last field on the Create Verified Instance screen is the Tags field. Tags are completely optional. Go ahead and add any tags that you want to assign to the instance and then click on the Create Verified Access Instance button. When you do, your Verified Access instance will be created, as shown in Figure 2. Of course right now, the instance that you have created does not actually do anything because it is little more than just an empty container.
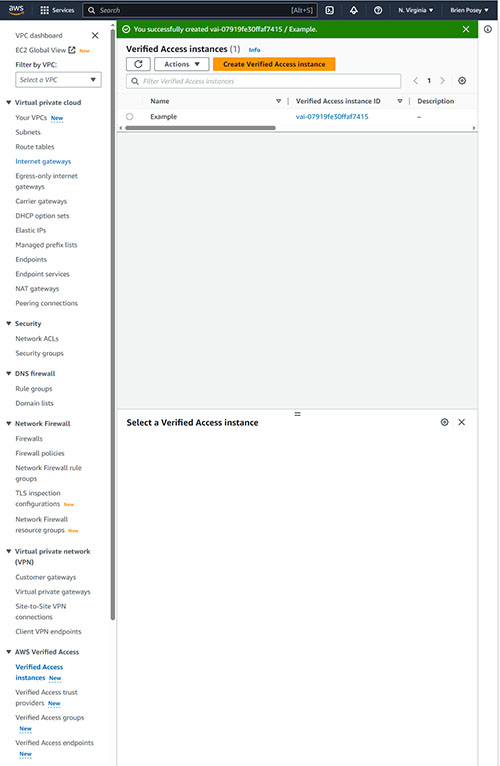 [Click on image for larger view.] Figure 2. The Verified Access Instance has been created.
Creating a Verified Access Trust Provider
[Click on image for larger view.] Figure 2. The Verified Access Instance has been created.
Creating a Verified Access Trust Provider
Now that we have created a Verified Access instance, I want to take a step back and show you how to create a Verified Access Trust Provider. If you look at the previous screen capture, you will notice that the column on the left side of the screen contains a section called AWS Verified Access. Go ahead and click on the Verified Access Trust Providers link found within this section. When you do, you will be taken to the Verified Access Trust Providers screen.
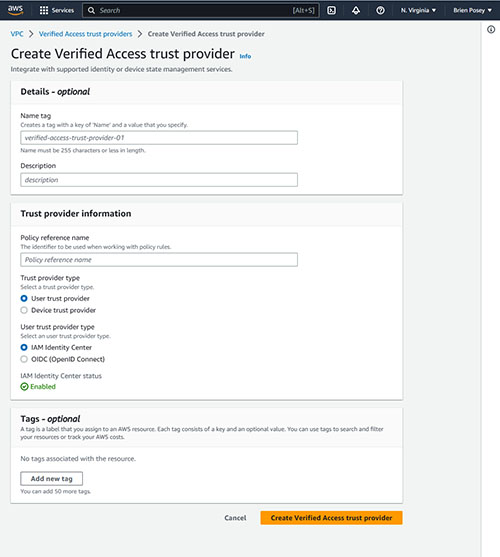
Click the Create Verified Access Trust Provider button and the console will display the screen shown in Figure 3. The first thing that you will need to do is to enter a name for the provider that you are creating. This is different from the Verified Access Instance name, because this name only applies to the trust provider, not to the instance. You can also enter an optional description of the trust provider that you are creating.
 [Click on image for larger view.] Figure 3. This is the screen used to create a Verified Access trust provider.
Even though you have just entered a trust provider name, you are also going to have to enter a policy reference name. This is the name that AWS will use when working with the policy rules that you create.
The next thing that you will have to do is to tell AWS what type of trust provider you are creating. You can create either a user trust provider or a device trust provider. If you opt for a user trust provider then you will have to tell AWS whether you want to use IAM as the identity center or if you would prefer to use OIDC (OpenID Connect). The previous figure shows the IAM Identity Center option being selected.
If you decide to create a device trust provider then you will have to select a device trust provider type. Your options include Jamf and Crowdstrike. You will also have to provide your tenant ID.
When you are done, add any tags that you want to associate with the trust provider that you are creating and then click the Create Verified Access trust provider button.
Now that we have set up the trust provider, there are a few more things that we need to do before the Verified Access Instance is ready to use. I will show you the remainder of the process in Part 2.
About the Author
Brien Posey is a 22-time Microsoft MVP with decades of IT experience. As a freelance writer, Posey has written thousands of articles and contributed to several dozen books on a wide variety of IT topics. Prior to going freelance, Posey was a CIO for a national chain of hospitals and health care facilities. He has also served as a network administrator for some of the country's largest insurance companies and for the Department of Defense at Fort Knox. In addition to his continued work in IT, Posey has spent the last several years actively training as a commercial scientist-astronaut candidate in preparation to fly on a mission to study polar mesospheric clouds from space. You can follow his spaceflight training on his Web site.