AWS Step-by-Step
Assessing Your Security with Amazon Inspector
Here's how to use the Amazon Inspector tool to check the health of your AWS instances from within.
Over the last several years, IT pros have been bombarded with news of one high-profile security breach after another. Given the seriousness of such attacks, and the sometimes irreparable post-breach fallout, it is critically important for IT pros to do what they can to protect their technology resources.
Amazon Web Services (AWS) provides a number of different mechanisms that can be used to improve security, but one that is really worth checking out is Amazon Inspector. First unveiled at the 2015 AWS re:Invent conference, Amazon Inspector is a tool for checking the security health of an instance.
Before I show you how to use Amazon Inspector, it is worth noting that Amazon Inspector is not a penetration testing tool. Penetration testing seeks to break into systems from the outside. Amazon Inspector looks at your AWS instances from within. In fact, Amazon Inspector even requires you to install an agent into your AWS instances.
The process used to install the agent varies depending on the operating system that is running within the AWS instance that you want to analyze. In the case of Windows Server instances, log in to the instance and then download the agent here.
The agent installation process is really simple and straightforward. As you can see in Figure 1, the installer is wizard-based and requires only that you agree to the license terms and click Install.
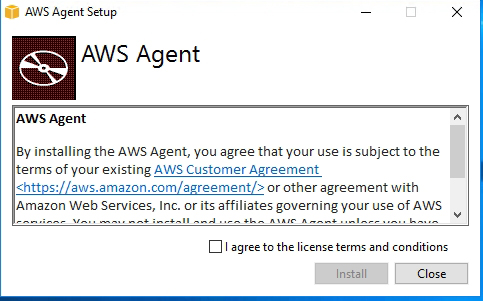 Figure 1: The AWS agent is very simple to deploy.
Once you have installed agents into your instances, you can access Amazon Inspector from the list of AWS services by clicking on the Inspector link found in the Security, Identity, & Compliance section. You can see what the main Amazon Inspector screen looks like in Figure 2.
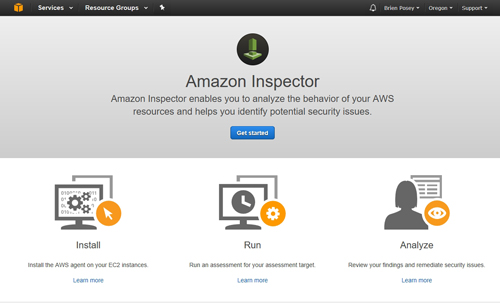 [Click on image for larger view.] Figure 2: This is the main Amazon Inspector console.
Click the Get Started button, and you will be taken to a screen that walks you through the initial configuration process. The first thing that you will have to do is to set Amazon Inspector's role. This essentially just means clicking the Choose or Create Role button, and giving Amazon Inspector permission to read the resources in your account.
You will also need to tag your AWS instances. You can use any tag/value pair that you want, but you will need some kind of tag and value that you can use to determine which instances to inspect. It is worth noting that Amazon Inspector can be provisioned with varying sets of rules, so it may be worthwhile to base your tags on the instances' role.
Click Next and you will be taken to a screen that asks which tags and values you want to use when defining an assessment target. Make your selection, as shown in Figure 3, and then click Next.
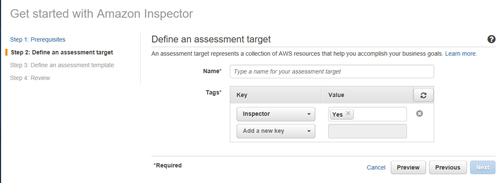 [Click on image for larger view.] Figure 3: Select the tags and values that you will use to identify the instances that are to be inspected.
The next screen requires you to define an assessment template. The basic idea here is that AWS uses packages or rules to perform assessment scans. The items that are tested during a scan vary depending on which rules package is in use. You can see the built-in rules packages in Figure 4, and it is also possible to create your own rules package. As you can see in below, you will need to enter a name for the template, pick a rules package and then set the duration of the scan.
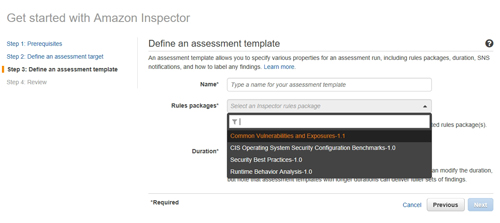 [Click on image for larger view.] Figure 4: Choose the rules package that you want to use for the scan.
Click Next and you will see a summary of the options that you have chosen. Assuming that everything looks good, click Create to create the assessment template. To run the template, select the template's checkbox, as shown in Figure 5, and click the Run button. It is also possible to perform scheduled scans by using AWS Lambda.
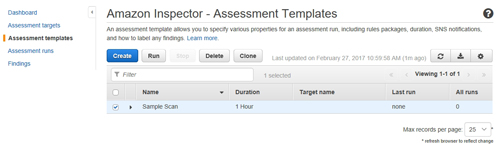 [Click on image for larger view.] Figure 5: Select your assessment template and click Run.
When the run finishes, you should see a status message indicating that the assessment is complete, as shown in Figure 6. You can then click on Findings to see the security health of the instance. The findings are organized in list format and each finding is rated by severity, ranging from Informational to High severity.
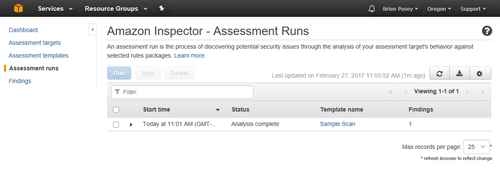 [Click on image for larger view.] Figure 6: The AWS console will tell you when the assessment is complete.
You can filter the list of findings based on the severity of the finding, so that you may address the most pressing issues first. Figure 7 shows the basic layout of the Findings screen.
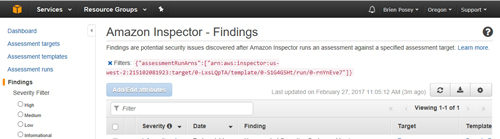 [Click on image for larger view.] Figure 7: Amazon Inspector provides a list of findings based on the chosen rule collection.
About the Author
Brien Posey is a 22-time Microsoft MVP with decades of IT experience. As a freelance writer, Posey has written thousands of articles and contributed to several dozen books on a wide variety of IT topics. Prior to going freelance, Posey was a CIO for a national chain of hospitals and health care facilities. He has also served as a network administrator for some of the country's largest insurance companies and for the Department of Defense at Fort Knox. In addition to his continued work in IT, Posey has spent the last several years actively training as a commercial scientist-astronaut candidate in preparation to fly on a mission to study polar mesospheric clouds from space. You can follow his spaceflight training on his Web site.