AWS Step-by-Step
Monitoring Configuration Changes with AWS Config
It isn't exactly a secret that the Amazon Web Services (AWS) cloud is a super flexible, and highly dynamic environment. While it is true that this flexibility can be incredibly beneficial, it also presents its share of management challenges.
It can, for instance, be tough to keep track of changes that are made to cloud resources. This can be especially true for organizations that have large AWS deployments or that have multiple AWS administrators.
Fortunately, there is a tool called AWS Config that can help you keep track of what is going on in the AWS cloud.
The first thing that you need to know about AWS Config is that it can be used for a variety of purposes. For example, you can create a set of rules using AWS Lambda, and then use AWS Config to check the compliance state of your AWS resources based on those rules. There is even a dashboard that you can use for compliance monitoring. For the purposes of this column, however, I want to talk about AWS Config as a basic resource monitoring tool.
To get started, open the AWS console and go to the AWS Config page. Make sure that you are logged in, and then click on the Get Started button. This will cause the console to display the Settings page. This screen, which you can see in Figure 1, requires you to provide four pieces of information.
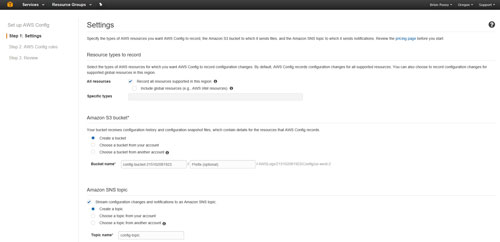 [Click on image for larger view.] Figure 1: This is the AWS Config Settings screen.
The first thing that you will need to specify is the types of resources that you want to monitor. By default, AWS Config will be set up to record configuration changes to resources in your region, but you have the option of keeping an eye on global resources, too. As an alternative, you can specify the specific types of resources that you want to monitor.
The second piece of information that you will have to provide is the name of an Amazon S3 storage bucket. AWS Config writes configuration history data (and configuration snapshots) to an S3 bucket, so you will have to tell AWS which bucket to use.
The third piece of information that you must provide on the Settings screen is the Amazon SNS Topic. SNS is Amazon's notification service, and an SNS topic is a communications channel used to send notifications. If you need a bit of help with this part, then be sure to check out my recent column on setting up SNS.
The last setting that you will need to provide on the Settings screen is the configuration role. AWS Config cannot track changes to resources unless it has permission to access those resources. As such, you can tell AWS to either create a role for AWS Config to use, or you can use an existing role.
Click Next, and you will be taken to Step 2 of the configuration process. Earlier, I mentioned that AWS Config can be used to test the compliance state of your AWS resources by comparing those resources against a set of rules. Step 2 of the configuration process allows you to choose the configuration rules that you want to use in such comparisons. Configuration rules are beyond the scope of this column (I plan to cover them in a future installment), but you can see what the screen looks like in Figure 2.
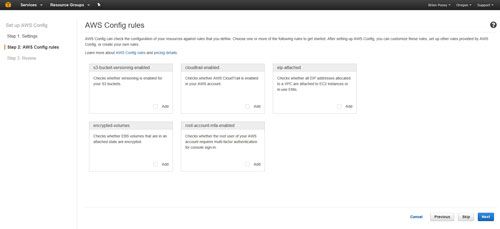 [Click on image for larger view.] Figure 2: This is where you can choose the AWS Config rules that you want to use.
After making your selections, click Next and you will be taken to Step 3 of the process. This step is really just a review of the configuration choices that you have made. Assuming that everything looks good, you can click the Confirm button to accept the configuration and complete the setup process, as shown in Figure 3.
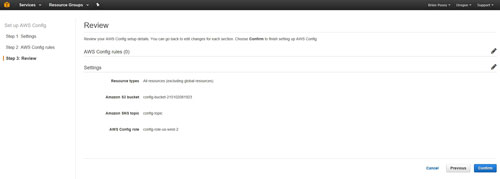 [Click on image for larger view.] Figure 3: Click the Confirm button to complete the setup process.
Once set up, the AWS Config interface is really easy to use. As you can see in Figure 4, AWS Config makes use of a search interface.
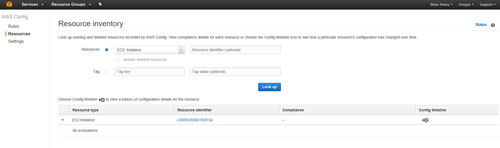 [Click on image for larger view.] Figure 4: AWS Config lets you search for resources and tags.
You can specify either a resource or a tag. In this particular case, I specified EC2 Instance as the resource type, and did not enter a resource identifier. The search returned the only EC2 instance that I was currently running. As you can see, the resource identifier is hyperlinked. Clicking on this hyperlink takes you directly to the resource.
About the Author
Brien Posey is a 22-time Microsoft MVP with decades of IT experience. As a freelance writer, Posey has written thousands of articles and contributed to several dozen books on a wide variety of IT topics. Prior to going freelance, Posey was a CIO for a national chain of hospitals and health care facilities. He has also served as a network administrator for some of the country's largest insurance companies and for the Department of Defense at Fort Knox. In addition to his continued work in IT, Posey has spent the last several years actively training as a commercial scientist-astronaut candidate in preparation to fly on a mission to study polar mesospheric clouds from space. You can follow his spaceflight training on his Web site.