AWS Step-by-Step
Creating and Logging In to a Windows VM in AWS
Don't be fooled. While it sounds rudimentary, the process of deploying an Amazon EC2 virtual machine can be disorienting if you're coming from a native Windows Server environment.
Logging in to a virtual machine (VM) seems like a simple thing to do. It's so simple, in fact, that I seriously considered skipping this topic in favor of something else.
Even so, when Windows administrators use Amazon Elastic Compute Cloud (EC2) for the first time, they often find that they are not quite sure how to deploy and log in to a VM.
The process isn't difficult, but it is significantly different from a native Windows Server environment (especially logging in for the first time). As such, I wanted to take the opportunity to show you how this works.
The first thing that you need to understand about creating and logging in to Amazon Web Services (AWS) virtual machines is that Amazon does not refer to them as virtual machines. In Amazon-speak, "virtual machines" are "instances."
You can access instances by logging in to the AWS console, and going into EC2. You can create a new instance by clicking on the Launch Instance button, shown in Figure 1.
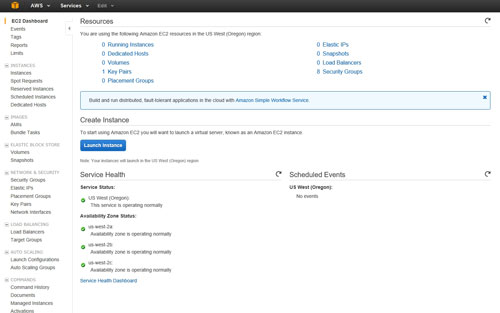 [Click on image for larger view.] Figure 1: Click on the Launch Instance button to create an AWS instance.
Upon clicking on the Launch Instance button, you will be taken to a screen that asks you to choose an Amazon Machine Image. Amazon Machine Image, or AMI, is another term that you need to be familiar with. An AMI is a template from which you can create a VM. Amazon provides Windows AMIs, as well as AMIs for a variety of Linux builds. At this point, you must simply select the AMI that you want to use, and click Select. For the purposes of this article, I am going to assume that you are creating a Windows VM.
Once you have chosen an AMI, you will be prompted to choose an instance type. The instance type determines the hardware resources that will be allocated to the instance that you are creating. For example, the instance type determines the number of virtual CPUs and the amount of memory that is assigned to the instance. After making your selection, click the Next: Configure Instance Details button, shown in Figure 2.
 [Click on image for larger view.] Figure 2: Choose your instance type.
The next screen that you will see is the Configure Instance Details screen. If you have ever created VMs using Hyper-V or Microsoft Azure, then this screen will be completely intuitive. It asks you which network you want to use, whether you want to join a domain -- that sort of thing. You can see the configuration options shown in Figure 3.
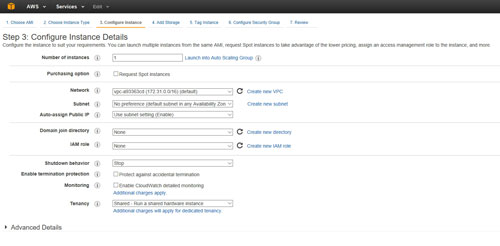 [Click on image for larger view.] Figure 3: The Configure Instance Details screen provides some basic configuration options.
Click Next: Add Storage, and you will be taken to the Add Storage screen. As you would expect, this screen lets you configure the storage type and volume size. You can also create new volumes.
Click Next: Tag Instance, and you will be taken to the Tag Instance screen. You don't really have to do anything on this screen. It exists only for the purpose of applying text tags to the instance. You can use these tags as a way of identifying or categorizing the instance.
Click Next: Configure Security Group and you will be taken to the Configure Security Group screen. Security groups are essentially a collection of instances that share a common set of firewall rules. You can use the Configure Security Group screen to create or join a security group, and to configure the group's firewall rules.
Click the Review and Launch button, and you will be taken to a screen that allows you to review the configuration options that you have chosen. Assuming that everything looks good, click the Launch button. Upon doing so, EC2 will display what is arguably the most important screen used in the entire process.
As you can see in Figure 4, AWS prompts you to create a key pair. This is a crucially important step, because you won't be able to log in to the instance unless you create a key pair. Simply choose the Create a New Key pair option, and then enter a name for the key pair that you want to create. After doing so, click the Download Key Pair button, and save the resulting file to a safe location.
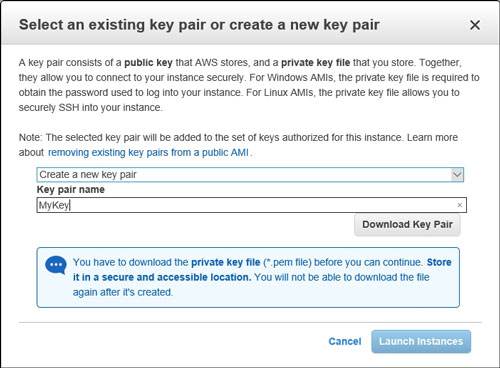 [Click on image for larger view.] Figure 4: Be sure to create and download a key.
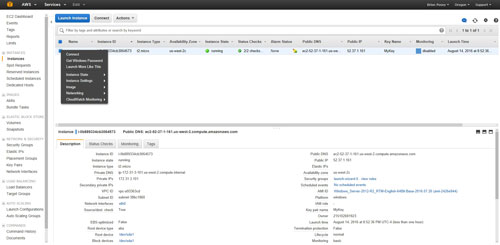
At this point, you can click the Launch Instance button to create your instance. The process takes some time to complete, but your new instance will eventually be ready for use. Go to the AWS home screen, click on EC2, and then click on the Instances link to see your instance.
Once the instance no longer displays an initializing message, you can log in to the VM. To do so, right-click on the instance's checkbox and choose the Get Windows Password option from the shortcut menu, as shown in Figure 5.
 [Click on image for larger view.] Figure 5: Right click on the instance, and choose the Get Windows Password option.
Upon doing so, you will see a dialog box prompting you for your key file. Click the Browse button and the select your key file. After doing so, click on the Decrypt Password button, shown in Figure 6. Upon doing so, your user name and password will be displayed, along with a reminder to change your password.
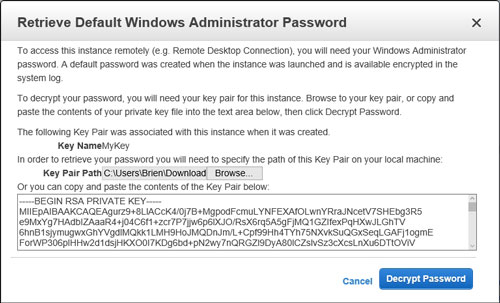 [Click on image for larger view.] Figure 6: Provide the key file and then click Decrypt Password.
Close the dialog box, click on your instance and click the Connect button. You will now be prompted to download an .RDP file for the instance. Open the file, and you will be prompted to enter your password, as shown in Figure 7. You will now be taken into the instance. Keep in mind, however, that the first time that you log in to an instance, it may take a couple of minutes before the session displays anything other than a black screen. You can see what a Windows instance looks like in Figure 8.
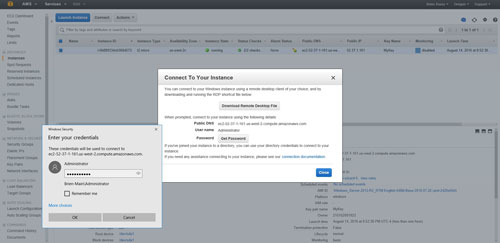 [Click on image for larger view.] Figure 7: You must enter your password.
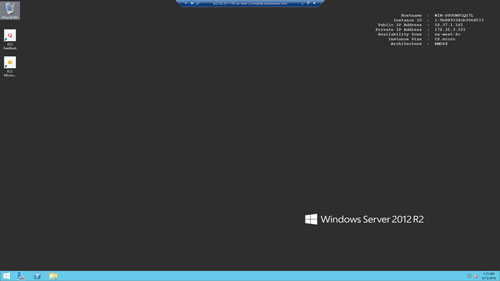 [Click on image for larger view.] Figure 8: You have logged in to the instance.
About the Author
Brien Posey is a 22-time Microsoft MVP with decades of IT experience. As a freelance writer, Posey has written thousands of articles and contributed to several dozen books on a wide variety of IT topics. Prior to going freelance, Posey was a CIO for a national chain of hospitals and health care facilities. He has also served as a network administrator for some of the country's largest insurance companies and for the Department of Defense at Fort Knox. In addition to his continued work in IT, Posey has spent the last several years actively training as a commercial scientist-astronaut candidate in preparation to fly on a mission to study polar mesospheric clouds from space. You can follow his spaceflight training on his Web site.