In-Depth
Step-by-Step: Configuring Amazon EC2 for Business-Critical Applications, Part 3
How to prepare your EC2 infrastructure to span two different regions -- the first step in ensuring your business-critical applications can endure the failure of an entire AWS region.
- By Dave Bermingham
- 02/15/2022
In Part 1 and Part 2 of this series, we looked at how to prepare the Amazon EC2 infrastructure to support business-critical applications by clustering them across two availability zones (AZs) in the same Amazon Web Services (AWS) region. While that does qualify you for the 99.99 percent AWS Compute SLA, it still does nothing to protect you from the outage of an entire region. As we recently saw in the Dec. 7 AWS outage, relying on a single AWS region leaves you at risk if an entire region experiences an outage.
In this installment, we will describe how to prepare your EC2 infrastructure to span two different regions. This is the first step in ensuring your business-critical applications can endure the failure of an entire AWS region. In Part 4, we will extend the previously built SQL Server failover cluster instance (FCI) by adding a third node in this region. Should the entire region fail, you will have automatic failover to this second region with minimal downtime and little to no data loss by using asynchronous block-level replication.
While having the ability to failover across regions might not protect you against all perceivable AWS outages, it does offer more protection than just a single-region deployment. In a future installment we will cover multicloud configurations. Multicloud deployments eliminate the cloud provider itself as a single point of failure.
This article references cloud resources that were created in Part 1 and Part 2 of this series. If you want to follow along with the steps below, you should have already completed the steps in the previous articles, or at least have a similar environment that you can use.
Create VPC
If you have been following along in this series, we previously created a VPC in US East containing the following three subnets:
AZ1: 10.0.1.0/24
AZ2: 10.0.2.0/24
AZ3: 10.0.3.0/24
Because a single VPC cannot span regions, we have to create a new VPC in a different region and create a Peering connection to connect the two regions. Unlike Azure's paired regions, AWS does not recommend which regions should be peered. You are free to choose whichever regions make most sense. Proximity, costs and data residency laws will likely dictate the region that makes most sense to peer with. With our existing VPC deployed in the US East (Ohio) region, we will create a VPC in US East (N. Virginia) and use that as our second region.
In this region, we will create a single subnet in a single AZ. The most important thing to remember when creating this VPC is that the subnet ranges cannot overlap with any other subnets in the region that you want to peer together.
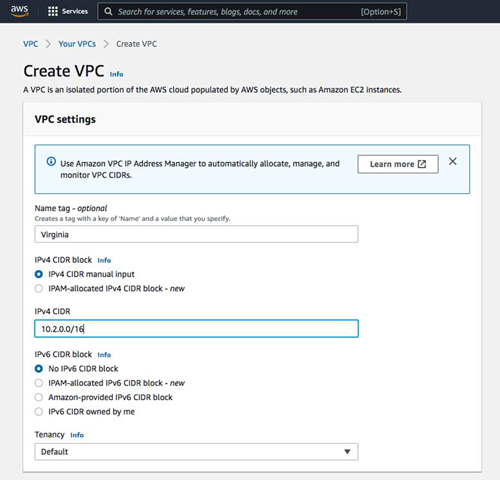
In this new region, we will create a VPC and Subnet as shown below:
VPC 10.2.0.0/16
AZ1 10.2.1.0/24
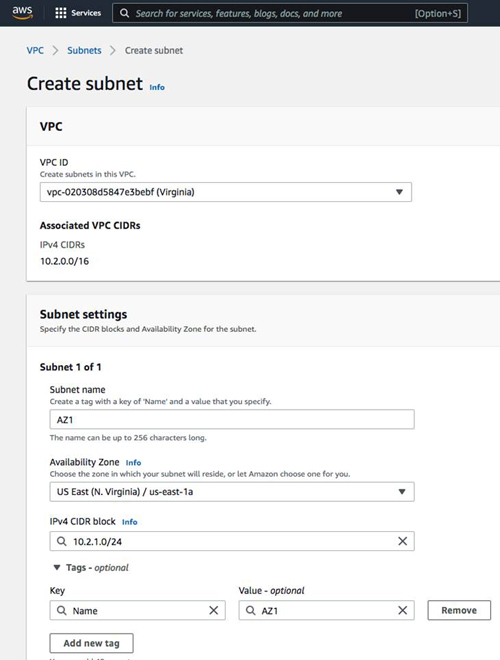
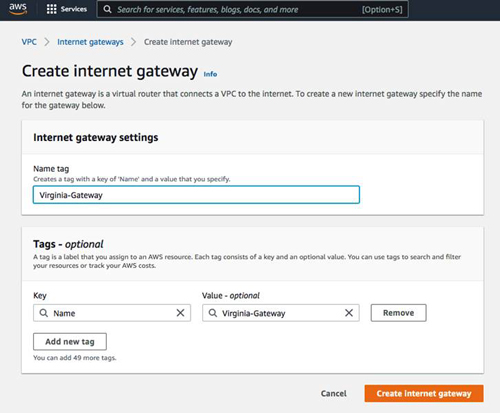
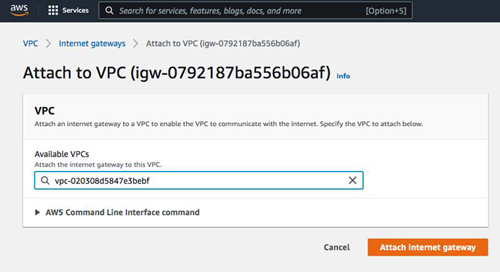
Make sure to enable auto-assign public IPv4 addresses. If you want resources in this VPC to reach the public Internet, you must also create an Internet gateway and assign it to this new VPC.
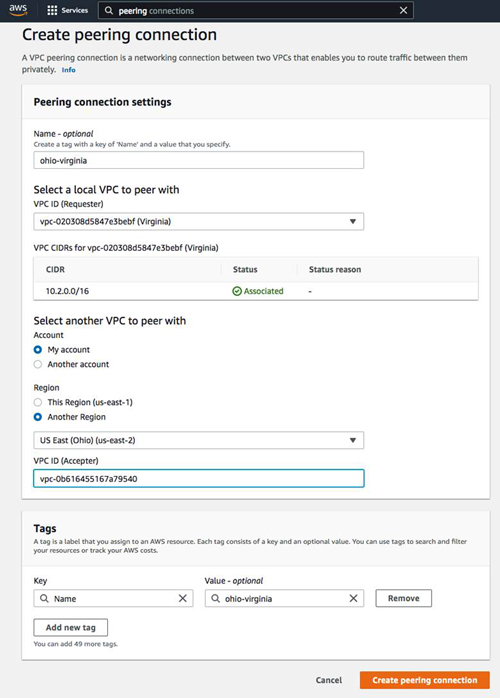
Create and Accept VPC Peering Connections
From either of the regions, create a peering connection. Before you begin this process, make sure you know the VCP ID of the VPC in the other region that you wish to connect to.
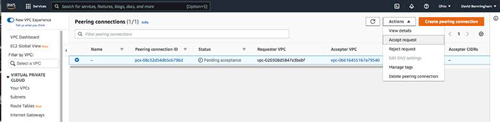
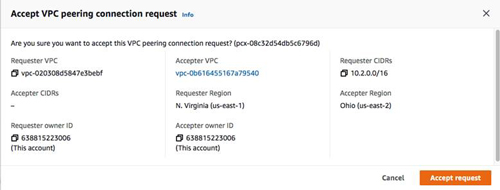
From the other region, you will see a pending peering request. Select that request and choose "Accept request" from the Action menu.
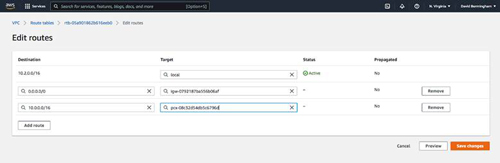
The next step is to modify your route tables so that each VPC can route to the other VPC.
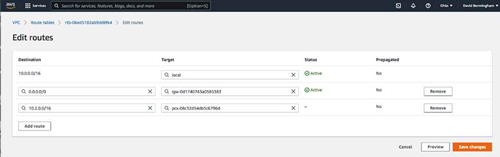
When editing the route table of the new VPC, don't forget to also add a route to the new Internet gateway that you added earlier.
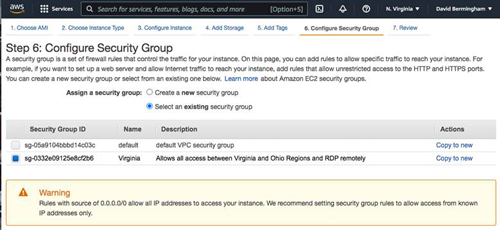
Update Security Groups
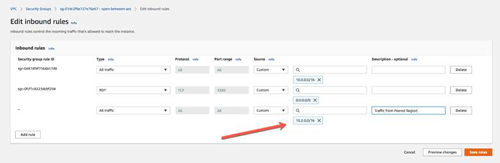
Update the existing security group in your original VPC. Add a rule that allows all inbound traffic from the new VPC.
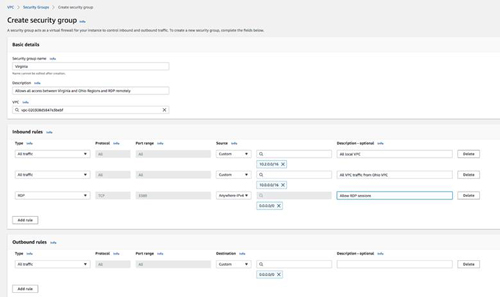
Create a new Security Group associated with the new VPC. Add rules to allow all traffic within the same VPC and from the remote VPC. Optionally, also allow RDP access. For more secure settings, use a jump box instead allowing direct RDP access.
Modify VPC Peering Connection DNS Settings
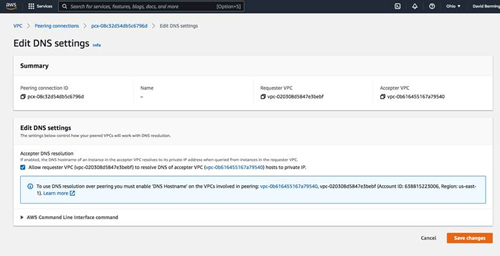
To allow DNS resolution of host names to local IP addresses, we must edit the DNS settings of the peering connection. But before we do that, we must make sure that each of the VPCs have DNS hostname and DNS resolution enabled. Take a moment now to ensure that each VPC has those settings enabled.
We are now ready to edit the DNS settings of the Peering connection. Be sure to allow both the acceptor and the requestor to resolve DNS hosts to private IP addresses.

Now that the two regions are peered together, we will deploy our first instance in the new region. If you are hosting your own Active Directory, one of the first things to do is to deploy a domain controller in the new region. Follow the steps below to deploy a domain controller in the new region.
Deploy Windows AMI
When deploying the new Windows AMI, be sure you are deploying it in the new subnet and be sure to set a static IP address. Select an existing security group and choose the new security group we created earlier.
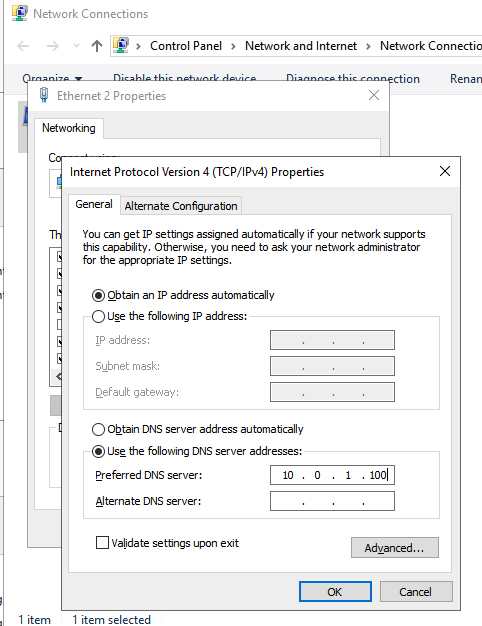
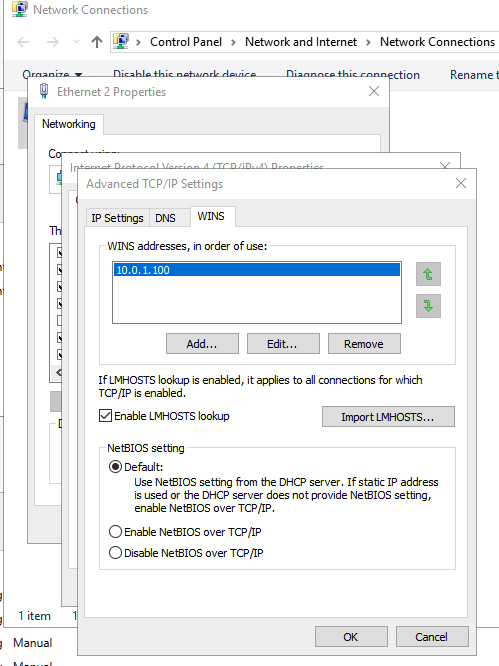
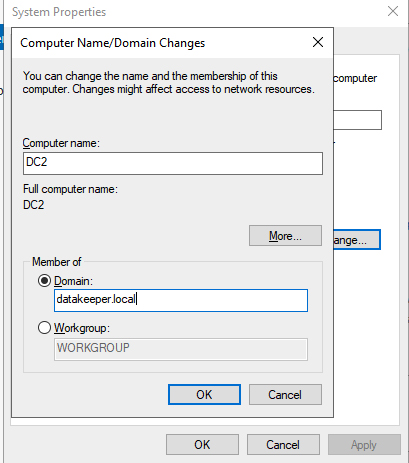
Log on the instance once it is provisioned. The first thing to do is to change the name of the server and add it to the domain. However, before you can do that, you need to edit the primary DNS server to point to the existing domain controller and add a WINS server, as shown below.
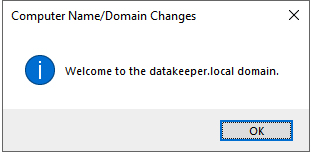
Now that we have joined the domain, we are ready to promote the server to a domain controller. The first step is to add the Active Directory Services feature.
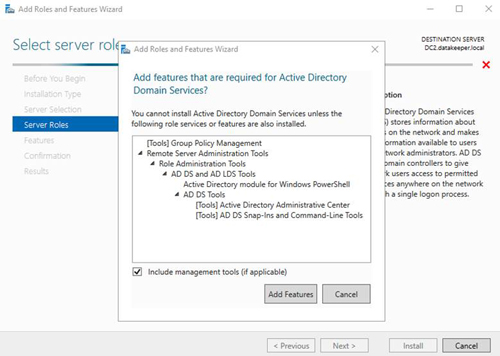
Once the Active Directory Domain Services feature is installed, the server can be promoted to a domain controller.
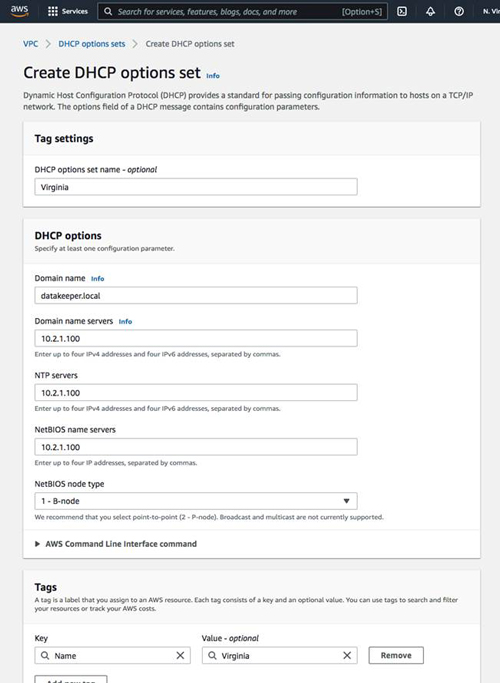
Create DHCP Option Set
Now that we have a domain controller in our new VPC, create a new DHCP option set and configure your VCP to associate with it. First, create the DHCP option set.
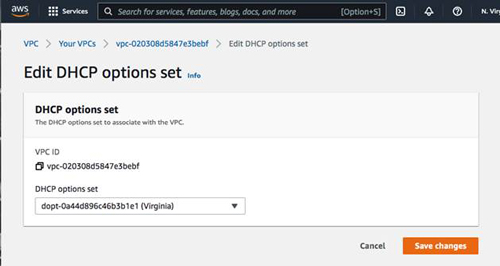
Next, associate this new DHCP option set with the VPC.

Edit TCP/IP Properties
Once the DHCP option set is created, edit the TCP/IP properties of the server so that it receives its settings from DHCP.
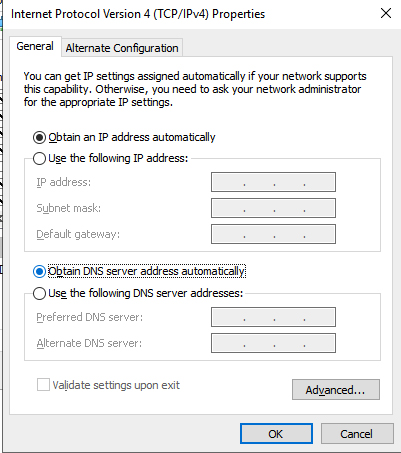
In my experience it helps if you also add the domain as the primary domain in the Append these DNS suffixes list.

Summary
At this point if you have been following along you should have an AWS infrastructure that looks something like the image below:
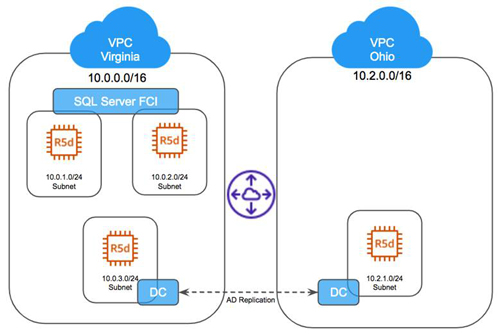
With the infrastructure in place, we are ready to address the availability of our business-critical applications. In the next article in this series, we will discuss how to extend the existing SQL Server FCI to a third node in Ohio to protect your business-critical workload from the failure of the entire Virginia region.
About the Author
Dave Bermingham is the Senior Technical Evangelist at SIOS Technology. He is recognized within the technology community as a high-availability expert and has been honored to be elected a Microsoft MVP for the past 11 years: six years as a Cluster MVP and five years as a Cloud and Datacenter Management MVP. Dave holds numerous technical certifications and has more than 30 years of IT experience, including in finance, health care and education. You can find him on Twitter at @daveberm.