AWS Step-by-Step
Using AWS for Enterprise Document Storage: Part 2
AWS WorkDocs isn't as powerful as competitors like Microsoft SharePoint, but it does offer organizations a way to host documents in the cloud and do basic collaboration. Brien shows how.
In the first part of this series, I explained how Amazon Web Services (AWS) WorkDocs could be used for enterprise document storage and how you have to begin by creating a directory environment. In this article, I'll continue the discussion by showing you how to use your previously created directory environment to set up WorkDocs.
Once you have created (or specified) a directory for WorkDocs to use, AWS will provision the WorkDocs environment and then send you an e-mail message telling you that your WorkDocs environment is ready to use. In my experience, the provisioning process takes about 10 minutes to complete. You can see what the e-mail message looks like in Figure 1.
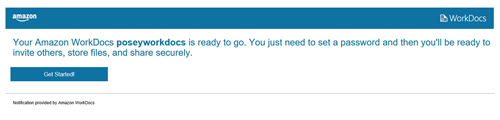 [Click on image for larger view.] Figure 1: AWS alerts you by e-mail to the creation of your WorkDocs environment.
Click the Get Started button, as shown in the figure above, and AWS will take you to the WorkDocs sign-in screen. Most of the information on this screen is pre-populated, so the only thing that you have to do is provide and then re-enter a password for your administrative account, as shown in Figure 2.
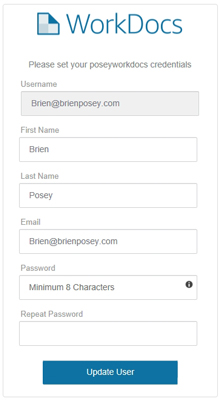 [Click on image for larger view.] Figure 2: Enter and then confirm your password.
After completing the sign-in process, you will be taken into the WorkDocs interface. The first time that you log in, you will see a short tutorial that is designed to familiarize you with the interface elements. As you can see in Figure 3, many of the interface elements are self-explanatory. For example, you can click on the Upload Files button to upload a file to WorkDocs.
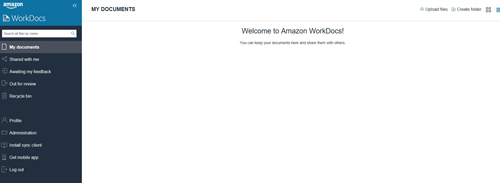 [Click on image for larger view.] Figure 3: This is the WorkDocs interface.
WorkDocs works well for storing documents in the cloud, but it can also be used as a collaborative tool. To show you what I mean, take a look at Figure 4. I uploaded a Word document to WorkDocs and then opened the document. After doing so, I selected a block of text and AWS automatically gave me the chance to post feedback. Notice that I was able to select a very granular portion of the document. I wasn't restricted by words or by paragraph structure. My selection actually cut across some words.
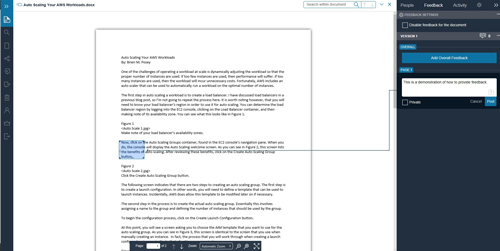 [Click on image for larger view.] Figure 4: WorkDocs lets you provide feedback within documents.
If you look at the upper-right portion of the figure above, you will notice that the interface contains a series of tabs. The People tab can be used to share the document with others. This tab also includes a button that you can use to send a message to everyone who has access to the document.
The Activity tab displays a log of interaction with the document. For example, you can use the Activity tab to see the document version number or to check to see when the document was originally uploaded.
Just to the right of the Activity tab is a Settings icon. There are only two settings that you can control through this icon -- you can prevent others from downloading the document, and you also have the option of disabling document feedback.
If you look back at Figure 3, you can see that there are a number of options shown on the left side of the screen. As an administrator, the most interesting of these menu options is probably the Administration option. Clicking on the Administration icon causes WorkDocs to open the Administration screen, which you can see in Figure 5.
 [Click on image for larger view.] Figure 5: Most of the administrative controls are located on the Administration screen.
As you can see in the figure above, this screen allows you to choose the preferred language for e-mail notifications. You can also change the WorkDocs storage quota. By default, each user gets 1TB of storage, but you can change this number or provide users with unlimited storage. Keep in mind that the storage quota setting is global, meaning that you can't assign 2TB to one user and half a terabyte to another. Everyone gets the same quota.
The Administration screen also contains two security settings. You can choose whether or not users are allowed to send external links to documents. You also have the ability to control who has the ability to invite new users. By default, only administrators can invite new users.
And speaking of new users, the last section on the screen allows you to manage user accounts. There is a link that you can use to invite new users, and you can also view the status, role and storage consumption for existing users.
There is an Edit icon associated with each user account, and clicking this icon lets you set the user's status (Active or inactive), role, and storage quota. You can see what this looks like in Figure 6 below.
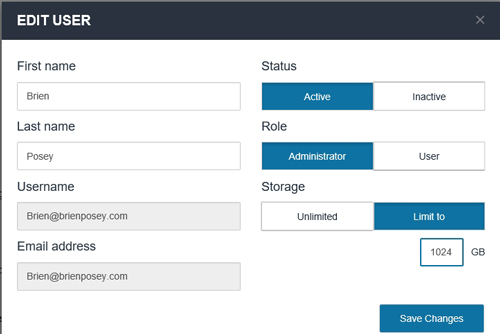 Figure 6: You can configure user accounts on an individual basis.
In conclusion, although WorkDocs isn't as powerful as competing platforms such as Microsoft SharePoint, it does offer administrators a way to host documents in the cloud and provides users with basic collaborative capabilities.
Related:
About the Author
Brien Posey is a 22-time Microsoft MVP with decades of IT experience. As a freelance writer, Posey has written thousands of articles and contributed to several dozen books on a wide variety of IT topics. Prior to going freelance, Posey was a CIO for a national chain of hospitals and health care facilities. He has also served as a network administrator for some of the country's largest insurance companies and for the Department of Defense at Fort Knox. In addition to his continued work in IT, Posey has spent the last several years actively training as a commercial scientist-astronaut candidate in preparation to fly on a mission to study polar mesospheric clouds from space. You can follow his spaceflight training on his Web site.