AWS Step-by-Step
Working with AWS Bucket Policies
By default, Amazon Web Services (AWS) storage buckets tend to be relatively permissive. Sure, there are bucket-level permissions that can be applied to a grantee, but these permissions consist only of List, Upload/Delete, View Permissions and Edit Permissions. A greater degree of control can be obtained over storage buckets through the use of bucket policies.
You can access bucket policies by logging in to the AWS console, going into S3, clicking on a storage bucket and then clicking on the Permissions tab. From there, you can click on the Add Bucket Policy icon. If you look at Figure 1 below, you can see the permissions that can be applied directly to a grantee, and you can also see the option to add a bucket policy.
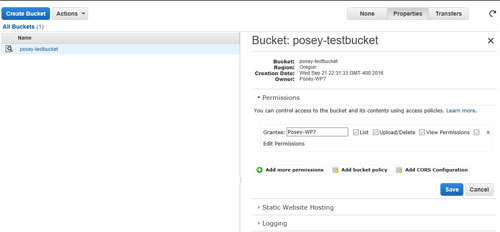 [Click on image for larger view.] Figure 1: Click the Add Bucket Policy link to apply a policy to the bucket.
When you click on the Add Bucket Policy link, AWS S3 displays what essentially amounts to an empty dialog box. As you can see in Figure 2, this dialog box contains an area in which you can create or edit a bucket policy, but does not contain a mechanism for generating that policy.
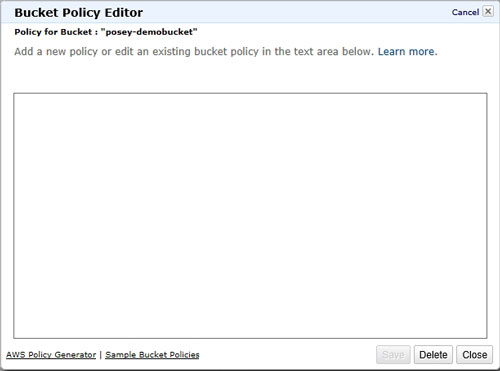 Figure 2: The policy window is blank.
Unfortunately, the AWS interface does not let you point and click your way through the bucket policy creation process. Bucket policies exist in the form of a JSON file that you must create from scratch.
Thankfully, AWS does provide some help. The AWS documentation contains several example policies, which you can find here. You probably won't want to use these policies as-in, but you can use them as a starting point for building your own custom policies.
There isn't anything overly complicated about the anatomy of a bucket policy file. The file contains a series of strings and values. The strings that are used will vary depending on what the policy is designed to do. Most policies start out with three strings:
- Version: Usually the date that the policy was created or modified.
- ID: A policy name.
- Statement: Designates that a block of policy settings is to follow. These policy settings are enclosed in brackets.
This portion of the policy looks something like this:
{
   "Version": "2016-09-21",
   "Id": "Posey Sample Policy",
   "Statement": [
     {
	The policy settings go here.
     }
   ]
}
As previously noted, the policy settings that are used can vary depending on what the policy is intended to do. There are five strings that are used in most cases. These five strings are:
- Sid: The SID basically determines what the policy does, and should not be confused with a Windows Security Identifier. For example, if the action that needs to be performed involves adding a user to an Access Control List (ACL), then the SID would be AddCannedAcl. Similarly, if the policy is designed to evaluate IP addresses, then the SID might be set to IPAllow. The previously mentioned Examples page lists a variety of SIDs that you can use.
- Effect: The Effect string controls what happens when the policy is applied. In most cases, the effect can be to either allow an action or to deny an action.
- Principal: The Principal string controls who the policy applies to. Setting the Principal string to * makes the string apply to everyone, but it is possible to specify individual AWS accounts.
- Action: The Action is what happens if the policy is applied. For example "s3:GetObject" allows the principal to read object data.
- Resource: The Resource is the bucket to which the statement applies. You cannot, however, simply enter a bucket name. The bucket name must be entered in a special format. If, for example, the statement were to apply to a bucket named poseydemo-test, then the resource would be expressed as "arn:aws:s3:::poseydemo-test/*".
Here is an example of a very simple bucket policy:
{
  "Version":"2016-09-22",
   "Id": "Posey Sample Policy",
  "Statement":[
    {
      "Sid":"AddPerm",
      "Effect":"Allow",
      "Principal": "*",
      "Action":["s3:GetObject"],
      "Resource":["arn:aws:s3:::poseydemo-test/*"]
    }
  ]
}
This simple policy (which was adapted from one of the examples shown in the AWS documentation) grants the s3:GetObject permission to public anonymous users, thereby allowing them to read the bucket contents. Such a policy might be useful if the bucket contained content for a public Web site.
As you can see, bucket policies allow for tighter control over bucket permissions. It is even possible to build conditional policies and multi-statement policies. You can find more information on access management within the AWS documentation here.
Related:
About the Author
Brien Posey is a 22-time Microsoft MVP with decades of IT experience. As a freelance writer, Posey has written thousands of articles and contributed to several dozen books on a wide variety of IT topics. Prior to going freelance, Posey was a CIO for a national chain of hospitals and health care facilities. He has also served as a network administrator for some of the country's largest insurance companies and for the Department of Defense at Fort Knox. In addition to his continued work in IT, Posey has spent the last several years actively training as a commercial scientist-astronaut candidate in preparation to fly on a mission to study polar mesospheric clouds from space. You can follow his spaceflight training on his Web site.