AWS Step-by-Step
Using AWS for Video Transcoding, Part 1
The first step in using AWS to convert a video into a different format is configuring the required S3 bucket. Brien walks you through the process.
One of the really cool things that you can do with Amazon Web Services (AWS) is video transcoding. This is essentially the process of converting a video into a different format.
Admittedly, there are a huge variety of utilities that you can download from various Web sites that can also transcode videos, and some of those utilities are even free. Even so, there are two main advantages to using AWS for video transcoding.
The first of these advantages is that AWS provides templates that make it easy to convert videos to a standard format. By doing so, AWS takes the guess work out of the conversion process.
The other benefit is that the AWS solution is highly scalable. This can be very helpful if you have a lot of videos to convert.
Let me give you a real-world example of why these benefits can be so compelling. Back in the spring, I had to take a class called "Spacecraft Egress and Sea Survival" as a part of my spaceflight training. Counting myself, there were four astronaut candidates in the class. Each of us brought cameras to record the training, and we had made a pact to share the raw video footage with one another once the class was over.
What I didn't initially think about, however, was that each of us was from a different country. Seriously. There were four of us, and we came from four different countries. Video standards differ in different parts of the world, so there was no real consistency in the recordings that we created.
In the end, I had hundreds of video clips in a variety of formats. Ultimately, I managed to convert these clips into something usable and use the clips to stitch together a video (which you can view at the end of this article). But just imagine how much more efficient the process would have been had I used AWS rather than perform the all of those conversions manually.
So with that said, let's take a look at how video transcoding works in AWS. There are two main steps in the process. The first step is to configure the required storage. The second step is to actually convert the video. I will walk you through the storage setup process in this article, and then I will show you how transcoding works in Part 2.
The AWS transcoding engine is based around the use of Simple Storage Service (S3) buckets. At a minimum, you are going to need to create two buckets. One of these buckets will act as an input bucket, while the other serves as an output bucket. Although I am limiting my examples to using two buckets, you can create multiple input and output buckets.
To create a bucket, log in to the AWS console and then choose S3 from the list of available services (it's located in the Storage section). Upon doing so, you will be taken to the Amazon S3 screen, shown in Figure 1.
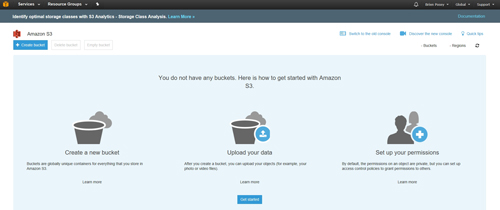 [Click on image for larger view.] Figure 1: This is the Amazon S3 dashboard.
Click on the Get Started button, and you will be taken to the Create Bucket screen. The first thing that you will have to do is to enter a name for the bucket that you are creating.
Although this sounds really straightforward, the name that you choose has to be unique across the entire AWS cloud. Therefore, you will need to choose a name that no one else is likely to select. In my case, for example, I called my video source bucket posey-video-source. You will notice that my last name (Posey) is typed in all lowercase characters. The reason for this is that AWS won't let you use uppercase characters within a bucket name.
Now, select your bucket region, as shown in Figure 2, and click Next.
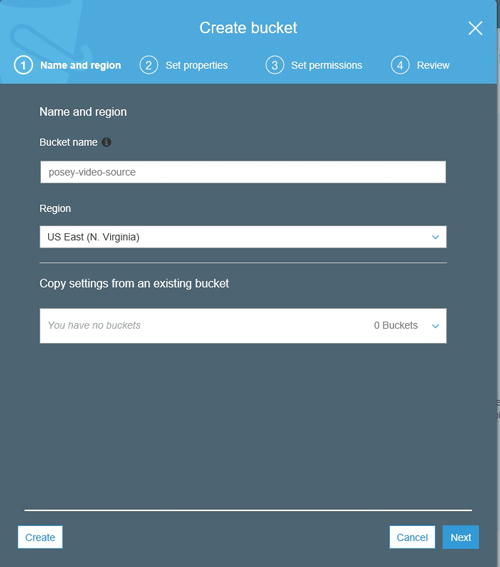 [Click on image for larger view.] Figure 2: You will have to use a unique name for your bucket.
Click Next, and you will be taken to a screen that prompts you to configure versioning information, tags and logging. Configuring these items is optional. When you are done, click Next.
At this point, you will be taken to the Permissions screen. Here you have the ability to set permissions for the bucket. By default, the bucket owner has both read and write access to the bucket, so you will probably be able to simply click Next to accept the defaults.
Finally, you will be taken to the Review screen. Take a moment and make sure that the bucket uses your intended configuration settings, and then click the Create Bucket button. Your new bucket should be listed on the Amazon S3 dashboard, as shown in Figure 3. Notice in the figure that the dashboard contains a Create Bucket button. You will need to use this button to create an output bucket for your video transcoding project.
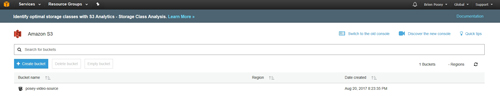 [Click on image for larger view.] Figure 3: The new bucket is listed on the Amazon S3 dashboard.
So, now that you have created the required storage buckets, it is time to transcode a video. I will show you how to do so in Part 2. In the meantime, here's that video I put together for my class:
About the Author
Brien Posey is a 22-time Microsoft MVP with decades of IT experience. As a freelance writer, Posey has written thousands of articles and contributed to several dozen books on a wide variety of IT topics. Prior to going freelance, Posey was a CIO for a national chain of hospitals and health care facilities. He has also served as a network administrator for some of the country's largest insurance companies and for the Department of Defense at Fort Knox. In addition to his continued work in IT, Posey has spent the last several years actively training as a commercial scientist-astronaut candidate in preparation to fly on a mission to study polar mesospheric clouds from space. You can follow his spaceflight training on his Web site.