AWS Step-by-Step
Using AWS To Manage On-Premises Servers
Although the Amazon Elastic Compute Cloud (EC2) is designed to run instances within the Amazon Web Services (AWS) cloud, the EC2 console can also be used to manage instances that are running within your own datacenter. These instances can be listed alongside cloud-based instances in the console (on-premises instances are displayed with a mi- prefix).
The exact method that you will have to use to manage an on-premises instance will vary depending on whether the instance is running Windows or Linux. For the purposes of this column, I am going to be using a Microsoft Hyper-V virtual machine that is running Windows Server 2016. Incidentally, AWS supports the use of Windows Server 2003 and higher.
To manage such an instance, log in to the AWS console and then go to the EC2 dashboard. Next, scroll to the bottom of the list of EC2 features that is located on the left side of the interface. Now, click on the Managed Instances link, located in the Systems Manager Shared Resources section, shown in Figure 1.
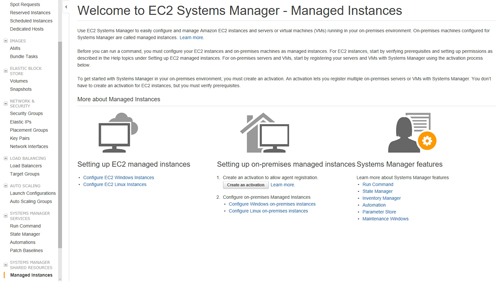 [Click on image for larger view.] Figure 1: Click on the Managed Instances link.
Next, click on the Create an Activation button, which you can see in the figure above. This will cause the console to display the Create Activation screen, as shown in Figure 2.
 [Click on image for larger view.] Figure 2: The Create Activation screen lets you generate a code which can be used to register an agent on an instance.
The purpose of creating an activation is to generate a code that you will eventually use in conjunction with an agent to bring an on-premises instance under management. As you can see in Figure 2, there are a few different pieces of information that you will need to provide.
The first is the activation description. This is just a friendly name that exists as a way of helping you to identify the activation.
Next, you will need to specify the instance limit. This limit refers to the number of virtual machines (VMs) that you want to manage in association with the activation. AWS sets this limit to one by default, but you can go as high as 1,000.
The third thing that you will have to specify is the IAM Role Name. This role essentially determines the permissions that will be used when managing your VMs. The default choice should be adequate for most situations, but AWS does give you the option of using a custom IAM role if necessary.
The next thing that you will have to configure is the activation expiry date. This is the date upon which the activation will expire. The date that you specify must be less than 30 days into the future.
Finally, you will need to enter a default instance name. This name exists to help you to identify your managed instance within the EC2 console.
Once you provide the required information, AWS will create the activation and will provide you with an activation code and an activation ID. Be sure to document this information, because you will need it later.
The next step in the process is to log in to your on-premises VM and download and run the following PowerShell commands:
$dir = $env:TEMP + "\ssm"
New-Item -ItemType directory -Path $dir
cd $dir
(New-Object System.Net.WebClient).DownloadFile("https://amazon-ssm-region.s3.amazonaws.com/latest/windows_amd64/AmazonSSMAgentSetup.exe", $dir + "\AmazonSSMAgentSetup.exe")
Start-Process .\AmazonSSMAgentSetup.exe -ArgumentList @("/q", "/log", "install.log", "CODE=code", "ID=id", "REGION=region") -Wait
Get-Content ($env:ProgramData + "\Amazon\SSM\InstanceData\registration")
Get-Service -Name "AmazonSSMAgent"
Note that you will have to replace the word region with the name of the region that you want to use. You will need to specify the region (in US-West-2 format) in both the URL portion of the code and in the Start-Process line. You will also have to replace the word code with your code and the word ID with your activation ID, in the Start-Process command.
If you have any problems with the code listed above, then be sure to check the contents of your $env environment variable. It is also a good idea to double check that you are using PowerShell with administrative permissions, and to make sure that all of the paths referenced within the script are correct.
Finally, it is a good idea to double check the AWS documentation. The block of code listed above came directly from here, and it is possible that AWS may make changes over time.
About the Author
Brien Posey is a 22-time Microsoft MVP with decades of IT experience. As a freelance writer, Posey has written thousands of articles and contributed to several dozen books on a wide variety of IT topics. Prior to going freelance, Posey was a CIO for a national chain of hospitals and health care facilities. He has also served as a network administrator for some of the country's largest insurance companies and for the Department of Defense at Fort Knox. In addition to his continued work in IT, Posey has spent the last several years actively training as a commercial scientist-astronaut candidate in preparation to fly on a mission to study polar mesospheric clouds from space. You can follow his spaceflight training on his Web site.