AWS Step-by-Step
Exploring Common Tasks in Amazon Lightsail
From creating and deleting instances to configuring IP addresses, here's a look at some routine management tasks in Lightsail and how they differ from AWS' main virtualization platform, EC2.
A few installments ago, I wrote about Amazon Lightsail and its potential to make creating virtual machine instances easier and less expensive. Because Lightsail is different from Amazon EC2, the main virtualization platform in Amazon Web Services (AWS), routine management tasks are often performed differently in Lightsail than they would be in an EC2 environment.
As such, I thought that I would use this week's column to show you how to perform some of the more common instance-related tasks in Lightsail.
Opening the Server Console
The technique used for opening the console for an EC2 instance tends to be a bit more complex than what might be expected. I won't rehash the process here because I want to focus on Lightsail, but you will need an RDP client and a key pair.
In the case of Lightsail, however, AWS has made the process easier. After creating a Lightsail instance, the instance appears on the Lightsail dashboard, as shown in Figure 1. When you click on your Lightsail instance, you will be taken to a screen that allows you to connect to the instance.
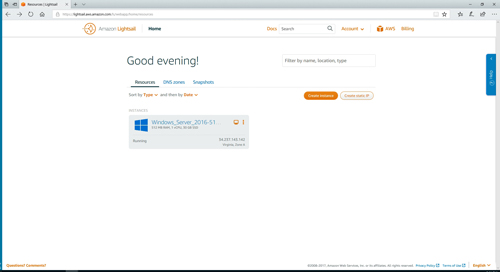 [Click on image for larger view.] Figure 1: This is the Lightsail dashboard view.
As you can see in Figure 2, you can connect to the instance using your own RDP client if you want to, but you can open the console from within your browser by clicking the Connect Using RDP button.
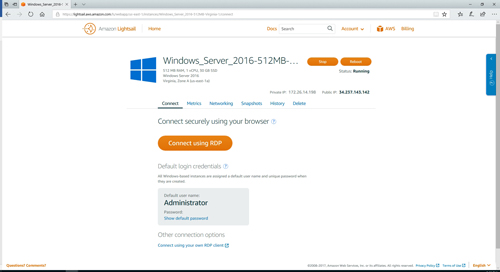 [Click on image for larger view.] Figure 2: You can click on the Connect Using RDP button to open the console.
Figure 3 shows what the browser-based console looks like. You will notice that AWS has provided a row of icons at the bottom of the window that can be used to send various key presses to the virtual machine instance.
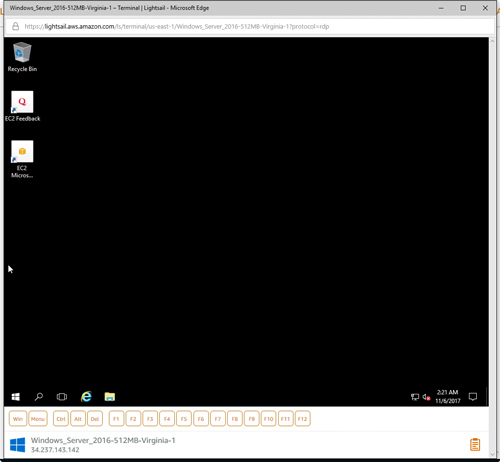 [Click on image for larger view.] Figure 3: This is what the console looks like.
Configure IP Addresses
AWS gives you the option of assigning a static IP address to Lightsail virtual machine instances. Even if you don't need a static IP address, however, the interface is convenient for determining which address a VM is currently using.
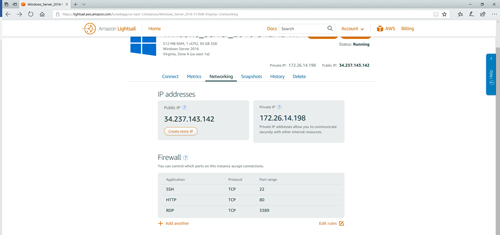
To access an instance's IP information, go into the virtual machine's dashboard (shown earlier in Figure 2), and then go to the Networking tab. As you can see in Figure 4, the Networking tab displays the instance's public IP address and its private IP address.
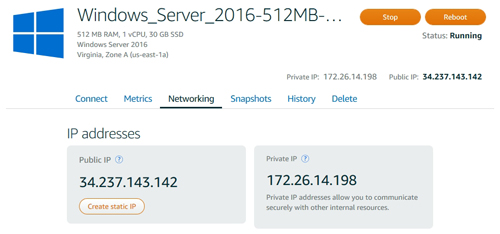 [Click on image for larger view.] Figure 4: The Networking tab lists the IP addresses that are being used.
If you want to assign a static IP address to a Lightsail instance, just click the Create Static IP button shown in Figure 4. Doing so will take you to a screen that is similar to the one shown in Figure 5 below. All you have to do now is enter a name for the IP address that you are creating, and then click the Create button.
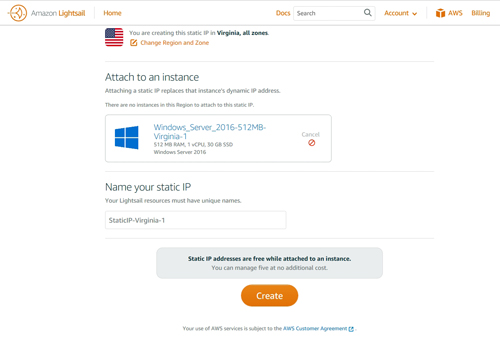 [Click on image for larger view.] Figure 5: Enter a name for your static IP address and click the Create button.
Open a Firewall Port
The Networking tab isn't just used for configuring the instance's IP address. It can also be used for configuring the instance's firewall settings. As you can see in Figure 6, the Networking tab contains a Firewall section, and you can add a firewall rule by clicking on the Add Another link.
 [Click on image for larger view.] Figure 6: You can use the Networking tab to configure firewall rules.
The nice thing about the interface is that many common firewall ports are predefined, so you don't necessarily have to know the port number that needs to be open. You can usually just select the protocol, as shown in Figure 7.
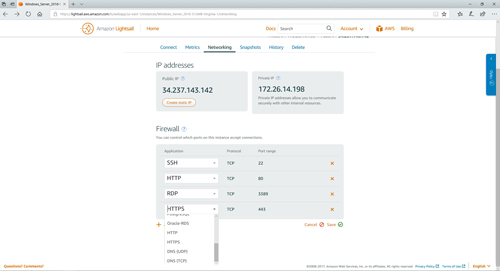 [Click on image for larger view.] Figure 7: AWS has made opening a firewall port effortless.
It is worth noting that if the VM instance contains an operating system firewall (such as the Windows firewall), then opening a port through the Lightsail dashboard does not automatically open the same port in the OS firewall.
Create a Snapshot
The Lightsail dashboard also contains a mechanism for creating virtual machine snapshots. To create a snapshot, simply go to the Snapshots tab, shown in Figure 8, and click the Create Snapshot button.
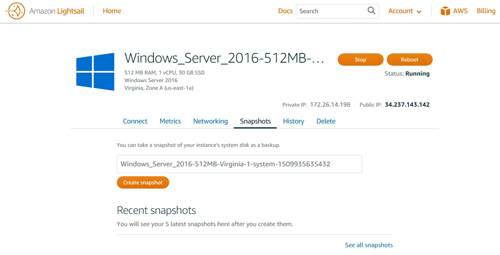 [Click on image for larger view.] Figure 8: The Snapshots tab contains a Create Snapshot button.
It is worth noting, however, that you can only create a snapshot if the instance is stopped. You can see what the snapshot creation process looks like in Figure 9.
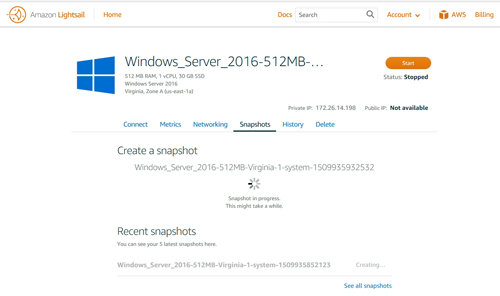 [Click on image for larger view.] Figure 9: This is what it looks like when you create a snapshot.
Deleting an Instance
To delete a Lightsail instance, go back to the Lightsail home screen and click the icon that is made up of three orange dots and corresponds to the virtual machine that you want to delete. This icon was shown back in Figure 1. Next, choose the Delete option from the resulting menu, as shown in Figure 10.
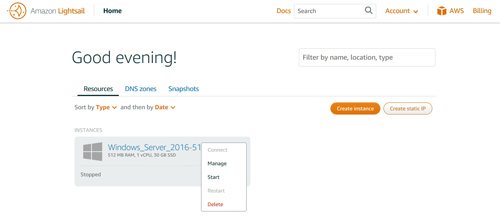 [Click on image for larger view.] Figure 10: Click the Delete button to delete the virtual machine.
Unlike with some virtualization platforms, it is not necessary to delete snapshots before deleting a virtual machine instance.
Related:
About the Author
Brien Posey is a 22-time Microsoft MVP with decades of IT experience. As a freelance writer, Posey has written thousands of articles and contributed to several dozen books on a wide variety of IT topics. Prior to going freelance, Posey was a CIO for a national chain of hospitals and health care facilities. He has also served as a network administrator for some of the country's largest insurance companies and for the Department of Defense at Fort Knox. In addition to his continued work in IT, Posey has spent the last several years actively training as a commercial scientist-astronaut candidate in preparation to fly on a mission to study polar mesospheric clouds from space. You can follow his spaceflight training on his Web site.