AWS Step-by-Step
Using Amazon SES for Bulk E-Mail Distribution, Part 1
With service providers aggressively targeting spam, DIY bulk messaging -- for legitimate e-mails, of course -- can often be more trouble than it's worth. Fortunately, AWS has a solution.
If you are like me, you probably receive lots of bulk e-mails each day. I'm not really talking about spam, but rather things like advertisements from companies that I regularly do business with, e-mail newsletters and that sort of thing. The point is that countless companies use bulk e-mail to engage their customers.
E-mail has been a viable means of communication for decades, and sending bulk mail to a list of customers seems like a really simple thing to do. After all, most of us occasionally use distribution lists to send messages to groups of co-workers. However, sending bulk e-mail can be surprisingly difficult to do.
Many years ago, I owned an IT-related Web site. The site allowed users to subscribe to a list to receive the latest tech information by e-mail. Seemingly overnight, the site had tens of thousands of subscribers, and sending out e-mails to all of those subscribers became problematic.
The main reason sending bulk e-mail became so challenging was because the IT industry was engaged in a concerted effort to eliminate spam. Microsoft, for example, made a change to some of the software that I was using, making it impossible to send bulk e-mail. I managed to get around the problem by using an old version. Soon, however, my ISP started cracking down on bulk messaging and threatened to disconnect me if I did not stop sending bulk messages.
While I would not categorize do-it-yourself bulk messaging as being impossible, it may very well be more trouble than it's worth. Fortunately, Amazon Web Services (AWS) has a solution in the form of Amazon SES, or Amazon Simple Email Service.
Before I tell you how to set up Amazon SES, I should point out that while marketing e-mail seems to be its primary use, it is not the only use. You can also use it to send out various types of notifications. Right now, for example, I am having one of my vehicles repainted, and the body shop that is doing the work sends me automated notifications by e-mail to let me know how the job is progressing. I don't know what software the body shop is using, but this type of thing could be done using Amazon SES.
To get started with Amazon SES, log in to your AWS console and then go to the SES dashboard, which you can see in Figure 1.
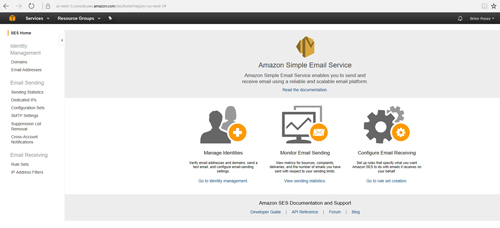 [Click on image for larger view.] Figure 1: This is the Amazon SES dashboard.
As you can see in the figure above, the dashboard contains three main functions: Manage Identities, Monitor Email Sending, and Configure Email Receiving. In case you are wondering about that last one, SES can be configured to receive e-mail and place it into an Amazon Simple Storage Service (S3) bucket. You might use this functionality to collect logs or alerts from monitoring software, for example.
If your goal is to send bulk e-mail, then the first step in doing so is to verify the e-mail addresses that you plan to use. AWS makes you do this as a way of proving that you own the e-mail address. If, for example, I wanted to send bulk e-mail that had a From or Return Path e-mail address of DoNotReply@BrienPosey.com, then I would have to verify that e-mail address.
Incidentally, you will notice that I used a mixture of capital and lowercase letters in the example e-mail address. AWS' verification process is case-sensitive. Therefore, verifying DoNotReply@BrienPosey.com would not entitle me to send mail from donotreply@brienposey.com. AWS would treat that as a different address, and I would therefore have to verify it separately.
Verifying an e-mail address is a relatively simple process. From the SES dashboard, click on the Manage Identities link. When the Identity Management screen appears, choose the Email Addresses option from the console tree, and then click on the Verify a New Email Address button, shown in Figure 2.
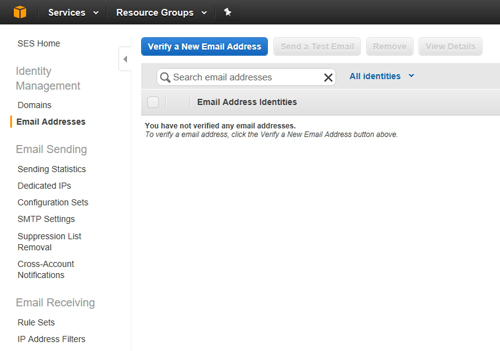 [Click on image for larger view.] Figure 2: Click on the Verify a New Email Address button.
You will now be prompted to enter the address that you want to verify, as shown in Figure 3. Enter the e-mail address and click the Verify This Email Address button.
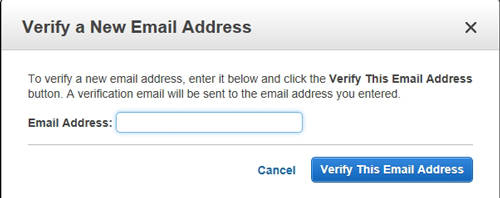 Figure 3: Type the e-mail address that you want to verify, and then click on the Verify This Email Address button.
At this point, AWS will send a verification e-mail message to the address that you have specified. It can take up to an hour for the message to be sent. Your e-mail address will also be listed within the SES console with a status of "pending verification," as shown in Figure 4.
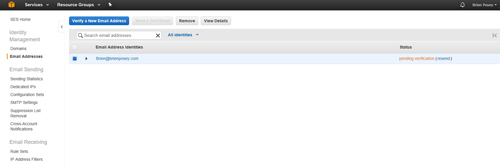 [Click on image for larger view.] Figure 4: Your e-mail address will be given a status of "pending verification."
Eventually, you should receive an e-mail message like the one shown in Figure 5. In my case, the message showed up almost immediately, rather than taking an hour. If you do not receive the message, the screen shown in Figure 4 above contains a resend link that you can use to resend the message. Once you receive the message, click on the link within it to verify your e-mail address.
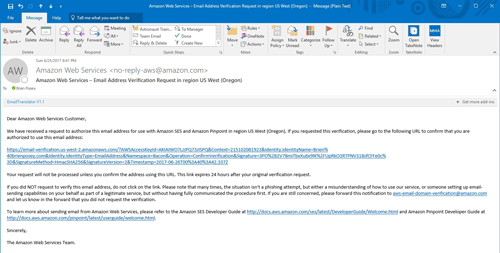 [Click on image for larger view.] Figure 5: This is what the verification message looks like.
Now that I have shown you how to verify an e-mail message, it's time to move forward with sending bulk mail. I will show you how in Part 2 here.
About the Author
Brien Posey is a 22-time Microsoft MVP with decades of IT experience. As a freelance writer, Posey has written thousands of articles and contributed to several dozen books on a wide variety of IT topics. Prior to going freelance, Posey was a CIO for a national chain of hospitals and health care facilities. He has also served as a network administrator for some of the country's largest insurance companies and for the Department of Defense at Fort Knox. In addition to his continued work in IT, Posey has spent the last several years actively training as a commercial scientist-astronaut candidate in preparation to fly on a mission to study polar mesospheric clouds from space. You can follow his spaceflight training on his Web site.