AWS Step-by-Step
Reducing Latency with EC2 Placement Groups
Creating a placement group in AWS to cope with latency issues is easy enough, but there are several important caveats and limitations to keep in mind.
Large organizations commonly run multi-tier applications (applications that span multiple servers) and, in many cases, communications between the servers that host the applications are sensitive to latency.
For applications running on-premises, this has historically been a trivial issue since it is easy to provide high-speed connectivity between physical or virtual machines (VMs). In the public cloud however, coping with latency issues can be more challenging.
Amazon Web Services' (AWS) solution to reducing latency between instances involves the use of placement groups. As the name implies, a placement group is just that -- a group. AWS instances that exist within a common availability zone can be grouped into a placement group. Group members are able to communicate with one another in a way that provides low latency and high throughput.
Creating a placement group couldn't be easier. To do so, log in to the AWS console and then open the Elastic Compute Cloud (EC2) dashboard. Next, click on the Placement Groups link, found in the console tree.
When the Placement Groups screen appears, click the Create Placement Group button, shown in Figure 1. This will cause AWS to open the Create Placement Group dialog box, which you can see in Figure 2. Type a name for the placement group and click the Create button.
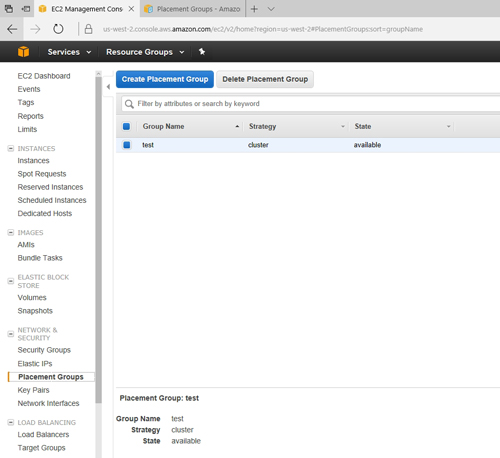 [Click on image for larger view.] Figure 1: Click on the Create Placement Group button.
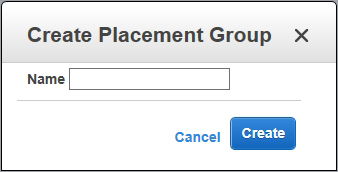 Figure 2: Type a name for your new placement group, and click the Create button.
That's all there is to it. It is worth noting, however, that the group creation process takes a little bit of time to complete, so your results will not be instantaneous.
As you can see, AWS makes it simple to create a placement group. Even so, placement groups have limits that must be kept in mind. The primary limitation that you are likely to encounter is a capacity limitation. When you create a placement group, what you are really doing is creating a capacity reservation for EC2 instances within an availability zone. Believe it or not, AWS does not currently charge a fee for establishing this capacity reservation.
The interesting thing about using a placement group to establish a capacity reservation is that AWS does not really give you any control over the process. There is no mechanism for explicitly controlling the volume of resources that you want to make available to a placement group. As such, it is necessary to carefully consider how a placement group will be used before you actually use it.
This, of course, raises the question of how to use a placement group. As previously mentioned, a placement group is really nothing more than a container that acts as a logical grouping of AWS instances. You cannot move an existing instance into a placement group. Instead, the placement group must be specified at the time that the instance is created.
Furthermore, not every instance can be launched into a placement group. AWS maintains a list of the instance types that can be launched into a placement group here. The supported instance types are large instances that are primarily optimized for compute, memory, storage or accelerated computing, although there are a few general-purpose instance types that are supported.
Because placement groups do have capacity limitations, and those capacity limitations are not something that you can control, AWS recommends that you use the same instance type for every instance that will be placed into the placement group. More importantly, AWS also recommends that you create all of the instances at the same time. There is nothing stopping you from going back and adding an instance to a placement group later on, but if you do so, you run the risk of encountering an error related to insufficient capacity within the placement group. Creating a batch of similarly sized instances is the safest way to ensure that all of the necessary instances will be created within the placement group.
There is one more important thing that you need to know about placement groups: Instances within a placement group generally have both a public and a private IP address. Communications across a public IP address are limited to 5Gbps or less. Low-latency, high-throughput communications between placement group members can only occur across the private interfaces, using the private IP addresses. These communications can be either 10Gbps or 20Gbps, and are limited by the instance's network configuration.
About the Author
Brien Posey is a 22-time Microsoft MVP with decades of IT experience. As a freelance writer, Posey has written thousands of articles and contributed to several dozen books on a wide variety of IT topics. Prior to going freelance, Posey was a CIO for a national chain of hospitals and health care facilities. He has also served as a network administrator for some of the country's largest insurance companies and for the Department of Defense at Fort Knox. In addition to his continued work in IT, Posey has spent the last several years actively training as a commercial scientist-astronaut candidate in preparation to fly on a mission to study polar mesospheric clouds from space. You can follow his spaceflight training on his Web site.