AWS Step-by-Step
Using AWS To Host WordPress
It's tempting to think of Amazon Web Services (AWS) as a solution for hosting virtual machine instances, allocating cloud storage and other IaaS-related tasks, but AWS can also be used as a platform for hosting Web applications. In fact, AWS makes it relatively easy to create your own WordPress site.
To get started, log into the AWS console, and then click on the Elastic Compute Cloud (EC2) option. Once you arrive at the EC2 dashboard, click on the big blue Launch Instance button, shown in Figure 1.
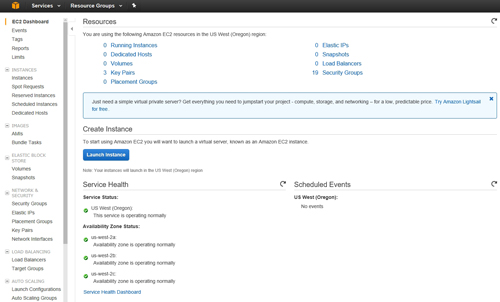 [Click on image for larger view.] Figure 1: Click the Launch Instance button.
At this point, AWS will display a list of the instances that you can create. You will see choices such as Amazon Linux, Red Hat, SUSE Linux and Windows. Rather than choosing one of these instance templates, however, click on the AWS Marketplace tab, located on the left side of the screen. Doing so will take you into AWS' marketplace. The marketplace, which you can see in Figure 2, is filled with software that is available for use in the AWS cloud. There is a fee associated with using most of the marketplace items, but there are some free options available.
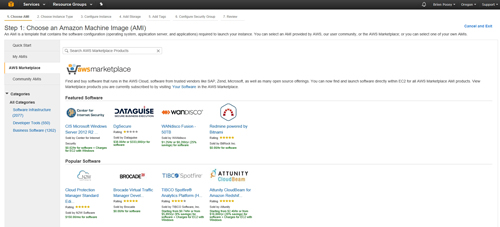 [Click on image for larger view.] Figure 2: The AWS Marketplace contains software that is designed to run on AWS.
At one time, it was possible to scroll through the marketplace and locate WordPress. Today, however, the AWS Marketplace contains thousands of items, so scrolling through the list of items isn't practical. That being the case, use the search box to search for WordPress. As you can see in the figure below, there are a number of different WordPress instances that you can install. You can simply scroll through the list of results until you find a WordPress instance that you like.
 [Click on image for larger view.] Figure 3: You can choose from a variety of WordPress instances.
As you make your selection, pay attention to the pricing structure. The WordPress instances that are shown in Figure 3 are priced at $0.00. However, that price only applies to the WordPress software. If you create a WordPress instance, you will still incur AWS usage fees, even though WordPress itself is free.
Upon making your selection, you will be taken to a pricing list. The pricing list tells you whether or not the instance is free-tier-eligible. It also breaks down the hourly fees based on instance type. In the case of the WordPress instance shown in Figure 4, for example, there is no fee for the WordPress software, regardless of instance size. However, EC2 fees still apply. A T2 Micro instance, for example, costs $0.012 per hour, while a Quadruple Extra Large instance costs $2.76 per hour.
There might also be storage costs that come into play. If storage costs apply, they will be listed at the bottom of the form. Keep in mind that the rates vary from one instance to another.
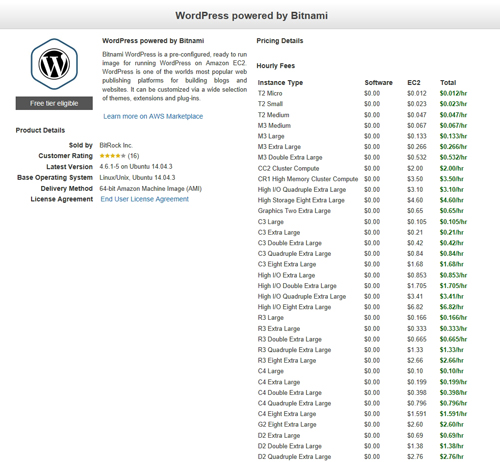 [Click on image for larger view.] Figure 4: AWS provides per-hour pricing estimates for the instance.
After reviewing the instance options, click Continue, and you will be taken to Step 2, which allows you to choose an instance type. Make your selection, and then click on Next: Configure Instance Details.
The Configure Instance Details screen is similar to the screen that you will see when creating any other type of instance. It allows you to specify the network configuration and shutdown behavior for the instance. When you are done, click Next: Add Storage.
The Add Storage screen gives you the chance to associate an Elastic Block Store (EBS) storage volume with the instance that you are creating. This screen is pre-populated, so you can accept the defaults if you are planning a small WordPress site. If you need to change the storage size or the volume type, however, you can do that, too. When you are done, click Next: Add Tags.
Tags are optional for instances. You can use tags to help you to classify and identify the instance, but there is no rule that says that you have to use tags. When you have finished with the Add Tags screen, click Next, Configure Security Group.
The Configure Security Group screen lets you either create a new security group or select an existing security group. More importantly, this screen allows you to configure the firewall rules for the instance. In the case of a WordPress instance, AWS defaults to opening ports 22 (SSH), 80 (TCP) and 443 (HTTPS). You can see what this looks like in Figure 5 below.
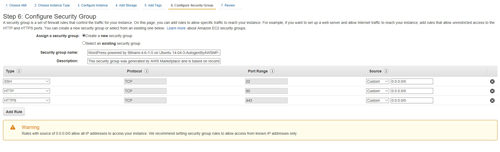 [Click on image for larger view.] Figure 5: These are the default port rules for the instance.
When you are done, click the Review and Launch button, followed by the Launch button to create your new WordPress site.
About the Author
Brien Posey is a 22-time Microsoft MVP with decades of IT experience. As a freelance writer, Posey has written thousands of articles and contributed to several dozen books on a wide variety of IT topics. Prior to going freelance, Posey was a CIO for a national chain of hospitals and health care facilities. He has also served as a network administrator for some of the country's largest insurance companies and for the Department of Defense at Fort Knox. In addition to his continued work in IT, Posey has spent the last several years actively training as a commercial scientist-astronaut candidate in preparation to fly on a mission to study polar mesospheric clouds from space. You can follow his spaceflight training on his Web site.