AWS Step-by-Step
Auto Scaling Your AWS Workloads
One of the challenges of operating a workload at scale is dynamically adjusting the workload so that the proper number of instances are used. If too few instances are used, then performance will suffer. If too many instances are used, then the workload will incur unnecessary costs.
Fortunately, Amazon Web Services (AWS) includes an auto scaler that can be used to automatically run a workload on the optimal number of instances.
The first step in auto scaling a workload is to create a load balancer. I discussed load balancers in this previous column, so I'm not going to repeat the process here. It is worth noting, however, that you will need to know your load balancer's region in order to use it for auto scaling. You can determine the load balancer region by logging into the EC2 console, clicking on the Load Balancer container, and then making note of its availability zone. You can see what this looks like in Figure 1.
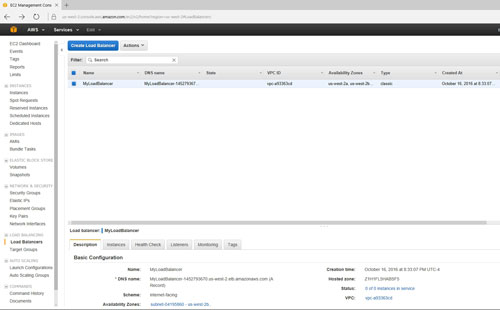 [Click on image for larger view.] Figure 1: Make note of your load balancer's availability zones.
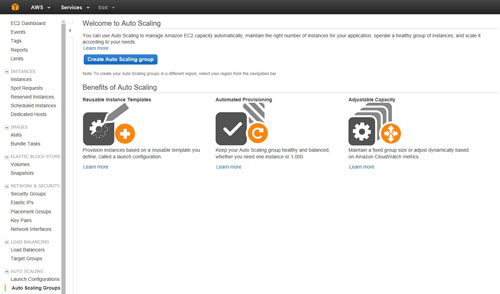
Now, click on the Auto Scaling Groups container, found in the EC2 console's navigation pane. When you do, the console will display the Auto Scaling welcome screen. As you can see in Figure 2, this screen lists the benefits of auto scaling. After reviewing these benefits, click on the Create Auto Scaling Group button.
 [Click on image for larger view.] Figure 2: Click the Create Auto Scaling Group button.
The following screen indicates that there are two steps to creating an auto scaling group. The first step is to create a launch configuration. In other words, you will need to define a template that can be used to launch instances. Incidentally, AWS does allow this template to be modified later on, if necessary.
The second step in the process is to create the actual auto scaling group. Essentially, this involves assigning a name to the group and defining the number of instances that should be used by the group.
To begin the configuration process, click on the Create Launch Configuration button.
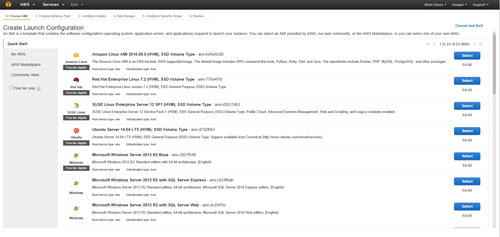
At this point, you will see a screen asking you to choose the AIM template that you want to use for the auto scaling group. As you can see in Figure 3, this screen is identical to the screen that you use when manually creating an instance. In fact, the process that you will work through when creating a launch configuration is very similar to that of setting up a new instance.
 [Click on image for larger view.] Figure 3: Choose the instance that you want to use.
Once you have finished creating your launch configuration, click on the Create Launch Configuration button. Upon doing so, you will be prompted to select an existing key pair or to create a new key pair, just as you would if you were creating an ordinary EC2 instance. Make your selection and click the Create Launch Configuration button.
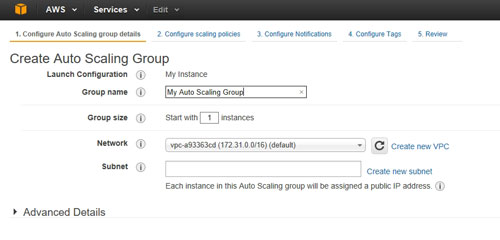
Now, you will be taken to the Create Auto Scaling Group screen, shown in Figure 4. As you can see in the figure, this screen prompts you to provide a group name and to specify the number of instances that you want to start with. There are also options to choose the network and subnet that you wish to use for the auto scaling group.
 [Click on image for larger view.] Figure 4: You must provide a name for your group and specify the number of instances that you want to initially use.
After making your selections, click Next and you will see a prompt asking you if you would like to keep the group at its initial size, or if you would prefer to use scaling policies to adjust the capacity of the group. The option to keep the group at its initial size is useful if you think you might need dynamic scaling in the future, but do not need it yet. Normally, however, you would choose the option to use scaling policies to adjust the group's capacity.
As you can see in Figure 5, you have the option of specifying the minimum and maximum number of instances to use in the group. You can also create policies for increasing and decreasing the group size. Notice in the figure that policy executions are based on alarms. As such, you will need to define some alarms that can be used to determine when the group should be scaled up or down. Make your selections, and click Next.
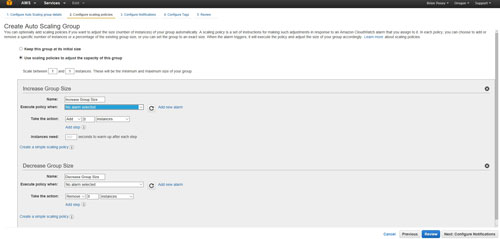 [Click on image for larger view.] Figure 5: You can set rules for increasing and decreasing the group size.
The next screen allows you to configure notifications. This is an optional step, but you can send notifications to an e-mail address based on instance launch, termination, launch failure or termination failure. You can see what the notification screen looks like in Figure 6 below.
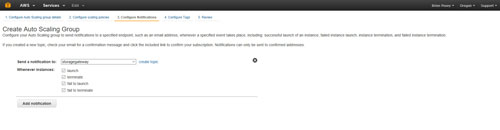 [Click on image for larger view.] Figure 6: AWS gives you the option of creating notifications.
Click Next, and AWS will display a screen that you can use to associate tags with your auto scaler. Once again, this is an optional step. When you are done, click the Review button. Take a moment to make sure that the auto scaling group details are correct, and then click on the Create Auto Scaling Group button to create the group.
As you can see, AWS makes it relatively easy to create an auto scaling group. However, because the entire auto scaling process hinges on the use of alarms, I'll talk about creating alarms specifically for auto scaling purposes in a future column.
Related:
About the Author
Brien Posey is a 22-time Microsoft MVP with decades of IT experience. As a freelance writer, Posey has written thousands of articles and contributed to several dozen books on a wide variety of IT topics. Prior to going freelance, Posey was a CIO for a national chain of hospitals and health care facilities. He has also served as a network administrator for some of the country's largest insurance companies and for the Department of Defense at Fort Knox. In addition to his continued work in IT, Posey has spent the last several years actively training as a commercial scientist-astronaut candidate in preparation to fly on a mission to study polar mesospheric clouds from space. You can follow his spaceflight training on his Web site.